

The little pumpkin takes shape slowly in my lap, its ridges gathering under the afternoon light while the hook makes that quiet click through each loop. A mug of coffee cools beside my yarn basket, and for a few minutes the room feels pleasantly unhurried. This small project belongs right at home in CreepyCute Halloween Crochet Patterns for Spooktober, where a handful of simple stitches can become a soft seasonal decoration without asking you to hurry. It takes a few evenings if you work gently, and the finished pumpkin has enough presence for a mantel, porch basket, or autumn table.
Why CreepyCute Halloween Crochet Patterns for Spooktober Is So Soothing to Crochet
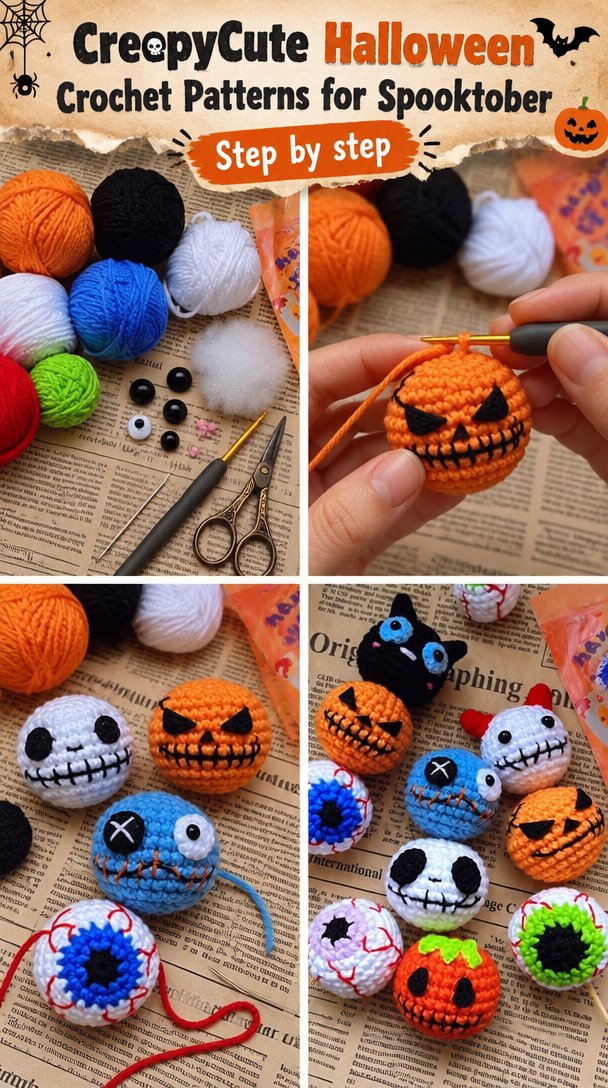
This crocheted pumpkin is a small, rounded piece with a ribbed surface and a simple gathered top. You work it as a flat rectangle, join the short edges, then draw the ends closed around a little stuffing. That shape keeps the project manageable, while the repeated rows give your hands a steady rhythm.
The main fabric uses half double crochet, a stitch that sits between single crochet and double crochet in height. It grows more quickly than single crochet but stays pleasantly substantial, so the pumpkin does not feel flimsy when you hold it. Working in the back loop only creates the raised ribs that make the finished piece look gently pleated.
There is something satisfying about watching a plain rectangle become round. The first rows may curl until the piece grows heavy enough to settle, but that is normal. After the first ten minutes, my hands usually warm up, and the yarn begins to slide through my fingers at an even pace.
This is the kind of project that fits a rainy evening on the couch or a cool Saturday morning near an open window. You can make one while a pot of soup simmers, or keep the work in a basket beside your armchair and add a few rows whenever the day gives you space. The pumpkin feels seasonal without requiring a large commitment.
The design also leaves room for quiet choices. A muted rust shade feels like dried leaves, cream looks soft beside a stack of books, and deep green gives the pumpkin a slightly woodland look. You can make one small pumpkin, or let several gather together in a bowl as the days turn cooler.
How This Project Feels as It Grows
You will begin with a foundation chain, which is the starting line of chains that supports the first row. The project uses half double crochet through the back loop only, abbreviated hdc BLO. In plain terms, you make a half double crochet, but place your hook under only the loop farthest from you. That small change creates the ridges.
Each row has the same number of stitches, so you can settle into the movement instead of solving a new problem every few minutes. The rectangle grows taller while its ridges run across the width. Once you join the edges, the ridges travel around the pumpkin and give it its rounded, ribbed appearance.
This pattern uses US crochet terms. UK readers often find these posts too, and the same word can mean a different stitch there, so please use the US meanings listed here. A chain is abbreviated ch, a slip stitch is sl st, and half double crochet is hdc.
The project suits a confident beginner who knows how to make a chain and work basic rows. The joining and gathering are the fiddliest parts, especially when you pull the yarn firmly enough to close the opening without snapping it. Plan on two to three relaxed evenings, or about three to four hours of actual crochet time.
Pattern at a Glance
Here are the main details to keep nearby while you work.
- Skill level: confident beginner
- Finished size: about 5 inches wide by 4 inches tall (13 cm by 10 cm)
- Gauge: 14 half double crochet stitches and 10 rows measure 4 inches (10 cm)
- Yarn: worsted weight (weight 4, medium), about 170 yards per 100 g skein, 85 yards total
- Hook: H-8 (5.0 mm)
- Other supplies: polyester fiberfill, yarn needle, scissors, stitch marker, and a small twig or brown yarn stem
- Stitch multiple: any even number of foundation chains, with 30 chains used here
- Estimated time: three to four hours, usually spread across two to three evenings
Gathering Your Materials
- About 85 yards of worsted weight (weight 4, medium) acrylic yarn, from a skein of about 170 yards per 100 g (3.5 oz); a rust, cream, mustard, or green shade works well
- An H-8 (5.0 mm) crochet hook; half a size up or down is fine depending on your tension
- A small amount of polyester fiberfill for stuffing, about 1 to 2 ounces (30 to 60 g)
- A yarn needle with a large eye for sewing and weaving in the ends
- Sharp scissors
- One stitch marker, optional, for marking the first row or joined seam
- A tape measure for checking gauge and finished size
- A short natural twig, about 1 inch (2.5 cm), or a small piece of brown yarn for the stem
For the yarn, I used a smooth worsted weight acrylic because it holds the ridges clearly, costs less than many specialty fibers, and washes easily if the pumpkin gathers a little dust. Lion Brand is one example of a widely available brand, but the fiber type matters more than the label. You can use a different worsted weight acrylic with similar yardage per skein, or choose a washable wool blend if you prefer a softer hand.
A gauge swatch takes about twenty minutes here, and it earns its place. Make a small square in half double crochet through the back loop only, then measure the center rather than the edge. If your stitches are looser, your pumpkin may grow wider and use more stuffing. If they are tighter, the fabric may become firm and smaller.
Acrylic melts under a hot iron, so do not press this project directly. If you need to smooth the fabric, use a little steam from a distance or block it cold with pins and let it dry. You can also substitute cotton, but cotton creates a heavier, less springy pumpkin and may show sharper ridges.
Step by Step
- Difficulty and stitch multiple: This is a confident beginner project using a stitch multiple of any even number. The sample begins with 30 chains and keeps 28 working stitches in every row after the turning chain.
- Make a slip knot and chain 30. The chain is your foundation chain, the row of linked loops that supports the fabric. Keep it relaxed rather than pulling each chain tight, because a tight foundation chain can make the lower edge pucker.
- For Row 1, yarn over, insert your hook into the second chain from the hook, yarn over, and pull up a loop. Yarn over again and pull through all three loops on the hook to make one half double crochet, or hdc. Repeat across, then chain 1 to turn. You will have 28 hdc.
- For Row 2, work one hdc in the back loop only of every stitch across. The back loop only, or BLO, is the loop farthest from you when you look at the top of the row. Chain 1 and turn. You still have 28 hdc.
- Repeat Row 2 until you have 20 rows in total. Count the rows by the raised ridges along the fabric edge, and check that each row still has 28 hdc. The yarn may feel a little stiff at first, then the fabric softens as the rectangle grows.
- Lay the rectangle flat with the ridges running from side to side. Bring the two short edges together, keeping the first and last rows aligned. Use a yarn needle and a length of the same yarn to sew the edges together with a whip stitch, or make slip stitches through both layers if you prefer a crocheted seam.
- Fasten off, leaving a tail about 18 inches (46 cm) long. Thread the tail onto your yarn needle and make a running stitch around one open end, passing the needle under the edge stitches. Pull gently to gather the end, then secure the opening with several small stitches.
- Turn the piece right side out if your seam sits inside. Add polyester fiberfill in small pieces, easing it into the corners and center. Fill it until the pumpkin feels rounded but still squeezes softly; overstuffing can stretch the ridges and make the seam work harder.
- Thread another yarn tail around the remaining open edge and pull it closed. Before securing it, press the pumpkin lightly between your palms and adjust the stuffing so the shape looks even. Tie several secure knots inside the opening, then pass the needle through the body and trim the tail close so it disappears inside.
- For the stem, insert a short twig into the center opening, or chain 5 with brown yarn and slip stitch back along the chain to make a narrow stem. If you use a twig, check that it has no sharp splinters. Sew the yarn stem securely, keeping it short and firmly attached.
- Look over the ridges and seam. If a missed stitch shows several rows below, do not tug at the whole piece right away. Mark the place, calmly pull back one row at a time to the error, repair the stitch, and repeat the row count before continuing.
- Weave in the ends by passing the yarn needle through several nearby stitches in different directions. Trim the excess after the yarn feels anchored. Acrylic usually needs no blocking, but if your rectangle looks uneven, pin it to the finished measurements and let it dry cold rather than applying direct heat.
Where This Piece Finds Its Place
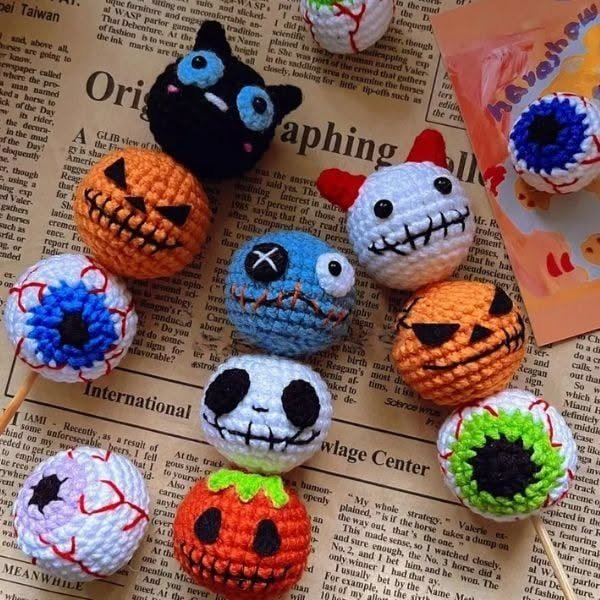
The finished pumpkin is small enough to tuck into a bowl, line along a mantel, or place beside a plant on the living room shelf. A group of three looks especially natural when you vary the colors slightly instead of making every pumpkin identical. One rust, one cream, and one soft green can sit together without making the display feel busy.
You can also place a single pumpkin in a basket beside the armchair, where it adds a little autumn texture without taking over the room. On a porch, keep it under cover so rain and prolonged sunlight do not wear the yarn quickly. It works nicely beside a stack of folded blankets during the first cold snap.
For gifting, make one pumpkin in a color that suits the recipient’s kitchen or entryway and add it to a small seasonal basket with tea, a wooden spoon, or a handwritten note. Keep the stem secure and avoid loose decorations if the recipient has young children or pets who may pull at small parts.
These pumpkins can also become place markers for a fall dinner. Use a paper tag tied around the stem, rather than sewing a button or bead onto the pumpkin. That keeps the decoration simple and makes it easier to remove the tag later.
Keeping CreepyCute Halloween Crochet Patterns for Spooktober Looking Good
This pumpkin uses acrylic yarn, so you can spot clean it with a damp cloth or wash it on a gentle cycle with cold water when needed. Place it in a mesh laundry bag if you wash it, and use a small amount of mild detergent. Avoid hot water, which can encourage the stuffing to shift and may stress the shape.
Dry the pumpkin flat on a clean towel and reshape it while damp. Never hang it wet, because the weight can pull the gathered ends out of shape. Acrylic does not need blocking for this project, and you should never place a hot iron directly on it.
If the ridges look flattened, use steam from a distance and let the pumpkin cool before handling it. Keep the steam light, since too much heat can make acrylic fibers shiny or permanently altered. A cold block works just as well for minor unevenness.
Store the pumpkin folded only if you have flattened it for the season, or keep it loosely in a breathable cotton bag. Do not seal it damp in plastic. Acrylic does not attract moths in the same way wool can, but a dry, clean storage space still helps the piece last.
Keep any leftover yarn with its label, especially if you hope to make matching pumpkins later. The label records the dye lot, fiber, yardage, and washing information, and even a small leftover ball can look noticeably different if it comes from another dye lot.
Small Ways to Make It Your Own
Try a thicker yarn if you want a larger pumpkin with a fuller presence. A bulky yarn will increase the size and make the ridges broader, while a thinner yarn will create a smaller pumpkin with more delicate texture. Change the hook to suit the yarn, and remember that stuffing can show through if your fabric becomes too loose.
Play with color blocking. Work the first 10 rows in rust and the final 10 rows in cream for a two-tone pumpkin, or change color every five rows for narrow bands. When changing colors, make the final yarn over of the last stitch with the new color, then carry or weave in the old color neatly.
If you prefer a firmer fabric, replace the half double crochet with single crochet, abbreviated sc. Single crochet makes shorter, denser rows, so the finished pumpkin will have more compact ridges and take longer to reach the same height. You will need to adjust the number of rows while watching the finished measurements.
Resize the pumpkin by changing the foundation chain in an even number. More chains make a wider rectangle and a wider pumpkin, while more rows make a taller pumpkin. Keep the stitch multiple even, and make a small sample first so the proportions stay pleasing.
A simple border can frame a flat version of the fabric if you decide not to stuff it. Work single crochet around the edge, placing one stitch in each row end along the sides and three single crochet in each corner. That option makes a useful mug mat or small seasonal coaster, though acrylic is not suitable for direct contact with hot cookware.
For a gift, make several small pumpkins in the recipient’s favorite colors and place them in a fabric-lined basket. You can also add a paper name tag for a fall table setting. Keep all tags, stems, and decorations secure, especially around children under three.
Frequently Asked Questions About CreepyCute Halloween Crochet Patterns for Spooktober
Can I use a different hook size for this crochet pumpkin?
Yes, you can use a different hook size, but it will change the fabric and finished size. Try G-6 (4.0 mm) for a denser fabric that hides stuffing well, or I-9 (5.5 mm) for a softer, slightly larger pumpkin. Make a gauge swatch first, since your personal tension affects the result more than the letter on the hook.
What yarn can I substitute for the worsted weight acrylic?
You can substitute another worsted weight yarn with similar thickness and about 170 yards per 100 g skein. Cotton gives a heavier, crisper pumpkin, while a washable wool blend gives more spring and warmth. Untreated wool can felt in warm washing, so use cool water and gentle handling. Choose smooth yarn so the BLO ridges remain easy to see.
What should I do if I find a mistake several rows later?
Pull back calmly to the row containing the mistake, rather than trying to force a correction through several finished rows. Mark the spot first, undo one row at a time, and count the 28 hdc before moving forward. If the error sits inside the stuffed pumpkin and does not affect the shape, you may choose to leave it as a quiet record of the making.
Is this pumpkin pattern suitable for a beginner?
Yes, this project suits a confident beginner who can chain and work half double crochet. The repeated BLO rows are straightforward, while joining and gathering require a little patience. If this is your first shaped project, make the rectangle slowly and count at the end of every row. The construction teaches useful skills without requiring a complicated stitch pattern.
How long does it take to crochet this pumpkin?
Expect about three to four hours of actual crochet and finishing time, usually spread across two to three evenings. Your speed, yarn thickness, and comfort with sewing the openings will affect the total. The rectangle works up steadily, but the final gathering and stuffing take a little extra attention because the round shape depends on those details.
Does this pattern use US or UK crochet terms?
This pattern uses US crochet terms. The main stitch is half double crochet, abbreviated hdc, which differs from the UK meaning of half double crochet. The other terms include chain, or ch, slip stitch, or sl st, single crochet, or sc, and back loop only, or BLO. Always check the terminology note before beginning if you usually read UK patterns.
Taking It Slow
Let the pumpkin take the time it needs. A row can be a small pause between parts of the day, and a missed stitch can become a reason to soften your hands rather than criticize them. Keep the yarn nearby, trust the count in front of you, and allow the finished piece to carry a little evidence of the quiet hours that made it.
—META—
SEO Title: CreepyCute Crochet Pumpkin Pattern
Meta Description: Make a calm CreepyCute Halloween Crochet Patterns for Spooktober pumpkin with simple US stitches, soft ridges, and gentle seasonal charm.
Slug: creepycute-halloween-crochet-pumpkin
Category: Crochet Patterns
Tags: crochet pumpkin, halloween crochet, fall crochet, beginner crochet, crochet decor
Image Alt Text: Crocheted ribbed pumpkin in rust yarn beside a hook and yarn basket
Close-up of half double crochet BLO ridges forming a pumpkin rectangle
Finished crocheted pumpkins arranged in a cozy autumn home
Pinterest Title: Easy Crochet Pumpkin Pattern
Pinterest Description: Crochet a soft ribbed pumpkin with simple stitches and a calm, steady rhythm. This small fall project suits quiet evenings and thoughtful handmade gifts.

Crocheted Pumpkin
- Total Time: 240 minutes
Description
Make a calm CreepyCute Halloween Crochet pumpkin with simple US stitches, soft ridges, and gentle seasonal charm. This small project is perfect for autumn decorations.
Ingredients
- About 85 yards of worsted weight (weight 4, medium) acrylic yarn
- An H-8 (5.0 mm) crochet hook
- A small amount of polyester fiberfill for stuffing, about 1 to 2 ounces (30 to 60 g)
- A yarn needle with a large eye
- Sharp scissors
- One stitch marker (optional)
- A tape measure
- A short natural twig, about 1 inch (2.5 cm), or a small piece of brown yarn for the stem
Instructions
- Make a slip knot and chain 30 to create your foundation chain.
- For Row 1, yarn over, insert your hook into the second chain from the hook, yarn over, and pull up a loop. Yarn over again and pull through all three loops on the hook to make one half double crochet (hdc), and repeat across. Chain 1 to turn; you will have 28 hdc.
- For Row 2, work one hdc in the back loop only (BLO) of every stitch across. Chain 1 and turn; you still have 28 hdc.
- Repeat Row 2 until you have 20 rows in total. Count the rows by the raised ridges along the fabric edge.
- Lay the rectangle flat with the ridges running from side to side and bring the two short edges together, aligning the first and last rows.
- Use a yarn needle and a length of the same yarn to sew the edges together with a whip stitch or use slip stitches through both layers for a crocheted seam.
- Fasten off, leaving an 18-inch (46 cm) tail. Thread the tail onto your yarn needle and make a running stitch around one open end, then gather the end and secure the opening with several small stitches.
- Turn the piece right side out and add polyester fiberfill until the pumpkin feels rounded but still squeezes softly.
- Thread another yarn tail around the remaining open edge and pull it closed. Adjust the stuffing for an even shape and tie several secure knots inside the opening.
- To create the stem, insert a short twig or chain 5 with brown yarn and slip stitch back along the chain. Check for sharp splinters if using a twig.
- Weave in the ends and trim any excess after the yarn feels anchored.
Notes
This project is suitable for a confident beginner who knows how to chain and work half double crochet. Be patient with the gathering and stuffing phases.
- Cook Time: 240 minutes