

The late afternoon light catches the yarn as it rests across your knees, and the hook makes that small, familiar pull through each loop. This Multi Colored Crochet Cellphone Pouch grows slowly in your hands, one neat section at a time, until the changing colors begin to look like a little woven sunset. I made mine beside a mug of coffee on a rainy Sunday, listening to the yarn slide softly over my fingers. It is a small project, but it gives your attention somewhere kind to land.
The Quiet Joy of Crocheting a Multi Colored Crochet Cellphone Pouch
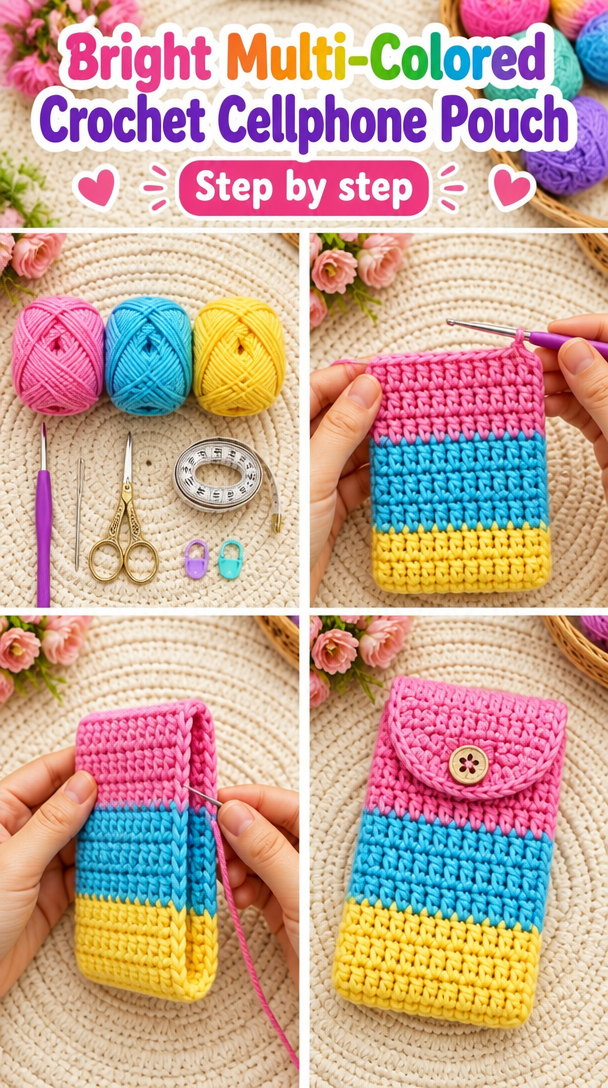
A pouch has a pleasing rhythm because it asks for just enough attention. You watch the edge, feel the fabric gather beneath your hand, and repeat the same simple movement until the rows begin to settle. There is no large blanket spread over the room and no long list of pieces waiting for you. You can carry this project to the couch, the porch, or the armchair beside the yarn basket.
The color changes bring a little variety without making the stitch pattern complicated. Each new shade gives your eye a resting place, while the steady fabric keeps your hands moving. Many people find crocheting calming, and I think small projects make that feeling especially easy to notice because you can see progress during one quiet sitting.
My first rows curled slightly at the edges, then relaxed once the pouch gained a little weight. After about ten minutes, my hands warmed up and the hook began to click in its usual small rhythm. That gentle repetition suits a rainy evening, a cool fall afternoon, or a summer morning when the porch is still shaded.
How This Project Feels as It Grows
This pouch uses double crochet as its main stitch. Double crochet, abbreviated dc, creates a fabric that grows quickly while still giving the color sections enough room to show clearly. The stitch feels familiar after a few rows, and the finished fabric has a soft drape without becoming loose and floppy.
The pattern uses US crochet terms. UK readers often find these posts too, and the same word can mean a different stitch there, so check your labels before beginning. You will work a foundation chain, turn rows, change colors, and fold the finished rectangle into a pouch.
The movement is simple: chain across, work double crochet back, turn, and repeat. A short single crochet border adds a firmer edge, while a flap and button keep the phone comfortably inside. The project takes about 3 to 5 hours, usually spread over several evenings if you prefer a slower pace.
The pattern is beginner friendly, though the color changes and final sewing take a little patience. A stitch marker is not essential, but it can help you mark the first stitch while you are getting used to turning chains and counting the row.
Pattern at a Glance
Keep this little list nearby while you gather your supplies.
- Skill level: Beginner
- Finished size: 4.5 by 7.5 inches (11.5 by 19 cm), excluding the button
- Gauge: 14 double crochet and 8 rows measure 4 inches (10 cm)
- Yarn: Worsted weight (weight 4, medium), about 170 yards per 100 g skein, 85 yards total or about 50 g
- Hook size: H-8 (5.0 mm)
- Other supplies: Yarn needle, scissors, tape measure, one stitch marker, and one 0.75-inch button
- Stitch multiple: Any multiple of 2 stitches, with 1 extra chain for the turning chain
- Estimated time: 3 to 5 hours
Gathering Your Materials
- Worsted weight yarn (weight 4, medium), cotton, about 170 yards per 100 g skein; you need 85 yards total or about 50 g, divided between two or three colors (easy to find)
- H-8 (5.0 mm) crochet hook (half a size up or down is fine depending on your tension)
- Yarn needle for sewing the side seams and weaving in the ends
- Small scissors
- One stitch marker (optional, helpful for marking the first stitch)
- Tape measure for checking the finished width and height
- One 0.75-inch button (can be swapped for a wooden button or a small crocheted loop closure)
I used worsted weight cotton because it gives the pouch enough body to protect a phone without feeling stiff. Lily Sugar’n Cream is one example of an easy-to-find cotton yarn, but you can use another worsted weight cotton with a similar yardage. A cotton fiber also handles regular handling and occasional washing better than a delicate novelty yarn.
Make a gauge swatch before you begin if you can spare twenty minutes. Work enough double crochet rows to measure 4 inches (10 cm), then count 14 double crochet across and 8 rows tall. The swatch tells you whether the pouch will fit your phone, and it also lets you notice if your foundation chain pulls tighter than the rows.
If your chain feels tight, go up one hook size just for the foundation chain, then return to H-8 (5.0 mm) for the first row. You can also substitute worsted weight acrylic, such as a smooth medium-weight yarn from Red Heart, but the fabric may feel warmer and slightly less crisp. Acrylic can melt under a hot iron, so block it cold or use steam from a distance without touching the fabric.
Step by Step
- Difficulty and repeat: This is a beginner-level project using any multiple of 2 stitches, plus 1 extra chain for the turning chain. The finished pouch measures about 4.5 by 7.5 inches (11.5 by 19 cm).
- With your first color, make a foundation chain of 17 chains. A chain, abbreviated ch, is the basic looped stitch used to begin many projects. Your 17 chains create 16 working stitches after the turning chain.
- Row 1: Skip the first 2 chains from the hook and work 1 double crochet in each remaining chain. To make a double crochet, yarn over, insert the hook, yarn over and pull up a loop, then yarn over and pull through 2 loops twice. You will have 15 double crochet.
- Chain 2 to turn. This turning chain brings the yarn to the height of the next row and does not count as a stitch in this pattern. Turn your work so the next row sits in front of you.
- Row 2: Work 1 double crochet in each of the 15 stitches across. Place the last double crochet into the top of the previous row’s final stitch, where the small V is easiest to see. You still have 15 double crochet.
- Change colors at the end of Row 2 if you would like three color bands. On the final yarn over of the last double crochet, pull through with the new color. Let the old yarn rest along the edge for a moment, leaving a tail long enough to weave in later.
- Rows 3 through 8: Chain 2 and turn, then work 1 double crochet in each of the 15 stitches. Change colors after Row 4 and Row 6, or arrange the shades in any order that feels pleasing. Each row has 15 double crochet, and the fabric should measure about 4 inches (10 cm) tall after Row 8.
- Rows 9 through 14: Continue with chain 2, turn, and 15 double crochet across. Keep the color arrangement as planned, or let the stripes become spontaneous. The fabric will measure about 7 inches (18 cm) tall at the end of Row 14, with 15 double crochet in every row.
- Rows 15 and 16: Work two more rows in the color you want for the flap. Chain 2, turn, and make 15 double crochet across each row. The full rectangle should measure close to 4.5 inches (11.5 cm) wide and 7.5 inches (19 cm) long.
- Make the border: Do not fasten off. Chain 1, then work single crochet evenly around the rectangle, placing 1 single crochet in the side of each row and 1 single crochet in each foundation-chain space along the bottom. A single crochet, abbreviated sc, makes a shorter, denser edge. Place 2 single crochet in each corner so the border lies flat.
- Join the border with a slip stitch, abbreviated sl st, into the first single crochet. A slip stitch moves the yarn without adding height. Fasten off and leave a 10-inch (25 cm) tail for sewing if you want to use that tail for one side seam.
- Fold the lower portion upward, leaving the top four rows free as the flap. Align the side edges carefully, then use a yarn needle and matching yarn to sew both side seams through the inner loops of the border. Keep your stitches close but not tight, because a pulled seam can make the opening narrow.
- Add the closure: Sew the button to the front center, about 0.75 inch (2 cm) below the top edge of the pouch section. On the flap, make a loop with a short strand of yarn, fasten it securely, and check that the loop fits over the button before trimming the ends.
- Check for mistakes calmly. If the top edge slants, count the small V shapes across the row and look for a missed final stitch. Pull back only to the place where the count changed, then rebuild the row slowly. I once found a missing stitch three rows later and had to undo a round, but the fabric looked better afterward.
- Weave in every yarn tail with the yarn needle, passing each tail through several stitches in different directions before trimming. This step feels fiddly, especially where the colors change, but it keeps the inside tidy. Cotton responds well to light blocking: dampen the pouch, shape it flat to the finished measurements, and let it dry completely.
Where a Multi Colored Crochet Cellphone Pouch Finds Its Place
The finished pouch slips easily into a tote, basket, or larger crochet bag. I like keeping mine on the small table beside the living room couch, where it holds my phone while I work on another project. The flap gives the piece a little structure, and the color bands make it easy to spot beneath a scarf or notebook.
It also makes a thoughtful small gift because you can choose colors for the person receiving it. Try warm rust and cream for a fall birthday, soft green and blue for a summer porch companion, or a school color combination for a practical holiday gift. Add a short wrist strap only if you sew it firmly through several rows, and never rely on a loose strap for a child’s use.
For children under three, avoid buttons and other small parts, along with long loose stitches that could become unsafe. If you make one for a child, keep the design simple, secure every end, and treat it as an item that needs adult supervision.
Caring for a Multi Colored Crochet Cellphone Pouch
Because this version uses cotton, wash it by hand or in a gentle machine cycle with cold or warm water. Place it in a mesh bag if you use the washing machine, and choose mild detergent without bleach. Press out extra water in a towel instead of twisting the pouch.
Dry the pouch flat and reshape the sides while it is damp. Never hang it wet, since the cotton can stretch and leave the pouch longer or wider than you intended. If the border curls, pin it lightly into shape and let it dry completely.
Cold blocking works well for cotton. You do not need a hot iron, and direct high heat can flatten the texture or scorch the yarn. If you substitute acrylic, keep the iron away from it because acrylic melts under a hot iron; use cold blocking or steam from a distance instead.
Store the pouch folded or lying flat in a breathable drawer rather than hanging it by the flap. Cotton does not need wool moth protection, but a clean, dry storage space keeps it fresh. Save leftover yarn with its label so you have the dye lot if you want to repair a seam or make a matching pouch later.
Small Ways to Make a Multi Colored Crochet Cellphone Pouch Your Own
- Try a thicker or thinner yarn if you want to explore a different size. A bulky yarn makes a larger, warmer pouch with more structure, while sport weight creates a lighter fabric and may need extra rows. Check the fit often because yarn weight changes the drape as well as the measurements.
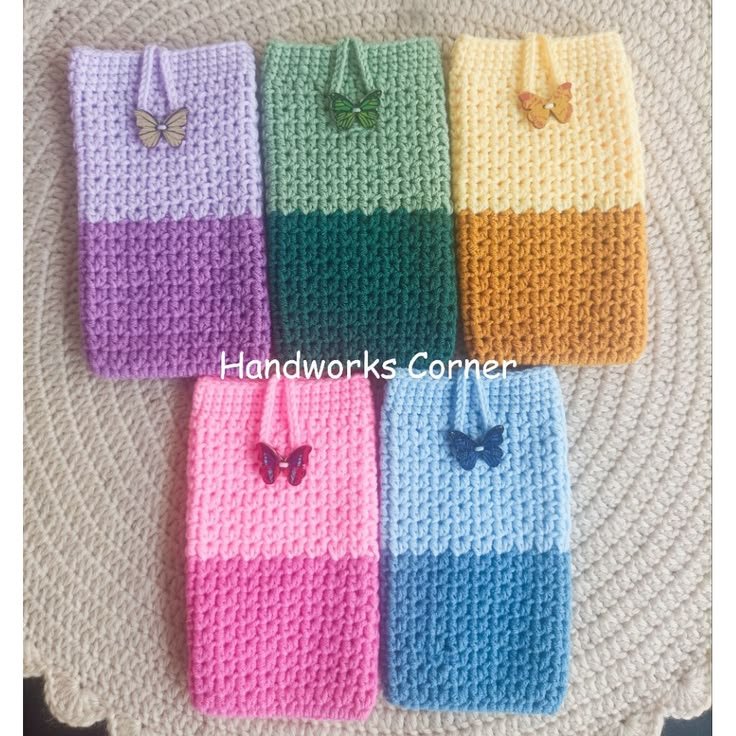
- Use two bold colors for clear color blocking, or let three gentle shades change every two rows. A marled or self-striping yarn can also provide color movement, though the stripes may not land evenly.
- Swap the double crochet for single crochet if you prefer a firmer fabric. Single crochet grows more slowly and creates a denser pouch, so expect to work more rows for the same height.
- Resize the pouch by adjusting the foundation chain in multiples of 2, plus 1 turning chain. Add or remove rows to change the height, and measure your phone against the fabric before sewing the side seams.
- Add a simple border in one contrasting shade, or replace the button with a crocheted loop and wooden button. For a gift, tuck in a small handwritten note or choose colors that match the recipient’s favorite scarf.
Frequently Asked Questions About the Multi Colored Crochet Cellphone Pouch
Can I use a different hook size for this cellphone pouch?
Yes, you can use a different hook size if your tension needs it. Try G-6 (4.0 mm) for a denser fabric or I-9 (5.5 mm) for a softer, more flexible fabric, then check the gauge and phone fit. A smaller hook helps keep the pouch from becoming too loose, while a larger hook may make it wider or taller.
What yarn can I substitute for the cotton?
You can substitute another worsted weight yarn with about 170 yards per 100 g skein. Smooth acrylic from Lion Brand works if you want a washable, affordable pouch, though it will feel less crisp than cotton. Wool can work too, but untreated wool may felt with warm washing, so follow the yarn label and avoid agitation.
What should I do if I find a mistake several rows later?
Pull back only as far as the mistake requires. Lay the fabric flat, count the 15 double crochet across the row, and look for the missing or extra stitch at the edge where rows meet. If the error does not affect the shape, you can leave it, but undoing a few rows usually gives the neatest result.
Is this cellphone pouch suitable for a beginner?
Yes, this project suits a beginner who knows how to make a chain and a double crochet. The color changes, border corners, and button loop are the fiddliest parts, but none require advanced shaping. Count the stitches at the end of each row, and use a stitch marker if the turning edge feels confusing.
How long does it take to crochet the pouch?
The pouch takes about 3 to 5 hours, depending on your pace and how carefully you sew the seams. The crocheted rectangle may take only a couple of hours, while color changes, weaving in ends, and the button closure add the rest. You can comfortably divide the work across several quiet evenings.
Does this pattern use US or UK crochet terms?
This pattern uses US crochet terms. The main stitch is double crochet, abbreviated dc, which is different from a UK double crochet. The pattern also uses chain, single crochet, slip stitch, turning chain, and foundation chain in their US meanings, so check your preferred terminology before beginning.
Take the Time You Need
Let the pouch grow at the pace your hands choose. You can pause with the hook resting in the last loop, return tomorrow, and find the same quiet rhythm waiting for you. The colors do not need to be perfect, and a small uneven place does not erase the care held in the finished piece. Make room for the simple pleasure of one stitch followed by another.
—META—
SEO Title: Multi Colored Crochet Cellphone Pouch Pattern
Meta Description: Make a Multi Colored Crochet Cellphone Pouch with simple US stitches, gentle color changes, and a calm step-by-step pattern for slow evenings.
Slug: multi-colored-crochet-cellphone-pouch
Category: Crochet
Tags: crochet pouch, cellphone pouch, beginner crochet, colorwork crochet, cotton crochet
Image Alt Text: Colorful worsted weight yarn and crochet hook beside a phone pouch project
Close view of double crochet rows in changing colors on the pouch
Finished multicolored crochet cellphone pouch with button closure
Pinterest Title: Multi Colored Crochet Cellphone Pouch
Pinterest Description: Crochet a small multicolored cellphone pouch with simple stitches and a thoughtful button closure. A calm, useful project for quiet evenings.

Multi Colored Crochet Cellphone Pouch
- Total Time: 300 minutes
Description
A small and calming crochet project to create a pouch for your cellphone using varied colors and double crochet stitches.
Materials
- Worsted weight yarn (weight 4, medium), cotton, about 170 yards total or about 50 g, divided between two or three colors
- H-8 (5.0 mm) crochet hook
- Yarn needle for sewing the side seams and weaving in the ends
- Small scissors
- One stitch marker (optional)
- Tape measure for checking the finished width and height
- One 0.75-inch button
Instructions
- With your first color, make a foundation chain of 17 chains.
- Row 1: Skip the first 2 chains from the hook and work 1 double crochet in each remaining chain. You will have 15 double crochet.
- Chain 2 to turn. Turn your work.
- Row 2: Work 1 double crochet in each of the 15 stitches across.
- Change colors at the end of Row 2 if you would like three color bands.
- Rows 3 through 8: Chain 2 and turn, work 1 double crochet in each of the 15 stitches. Change colors after Row 4 and Row 6.
- Rows 9 through 14: Continue with chain 2, turn, and 15 double crochet across.
- Rows 15 and 16: Work two more rows in the color you want for the flap.
- Make the border: Chain 1, then work single crochet evenly around the rectangle.
- Join the border with a slip stitch into the first single crochet. Fasten off and leave a 10-inch tail for sewing if you want to use that tail for one side seam.
- Fold the lower portion upward, leaving the top four rows free as the flap.
- Align the side edges carefully, then use a yarn needle and matching yarn to sew both side seams.
- Add the closure: Sew the button to the front center, then make a loop with a short strand of yarn.
Notes
A stitch marker can help mark the first stitch while you are getting used to turning chains and counting the row. For children under three, avoid buttons and ensure safety measures.
- Preparation Time: 20 minutes
- Active Time: 180 minutes