

Make playful bottle cap keychains that kids can personalize with colors and simple decorations for everyday fun. Perfect for your next craft day. The soft sound of tiny bottle caps clinking together offers a delightful prelude to crafting. As we gather around a warm table, the bright colors of paints and markers beckon, inviting our hands to create something new. The air fills with a sense of anticipation, and as we touch the smooth, cool surfaces of the bottle caps, we breathe in the warmth of creative potential. Each cap holds a promise of joy, waiting for little ones to add their unique sparkle, turning something simple into a treasured keepsake.
Why Make This Make playful bottle cap keychains that kids can personalize with colors and simple decorations for everyday fun. Perfect for your next craft day.
Making playful bottle cap keychains provides a cozy retreat into creativity. The process allows children to engage their senses fully, connecting with the colors and textures around them. As they paint and decorate, they focus on the moment, drawing their attention away from the noisiness of life outside. Crafting these little keepsakes encourages mindfulness, as children choose colors and designs that resonate with their personalities. This gentle attention to detail fosters a quiet concentration that can be very soothing, creating a space for calm amidst the busyness.
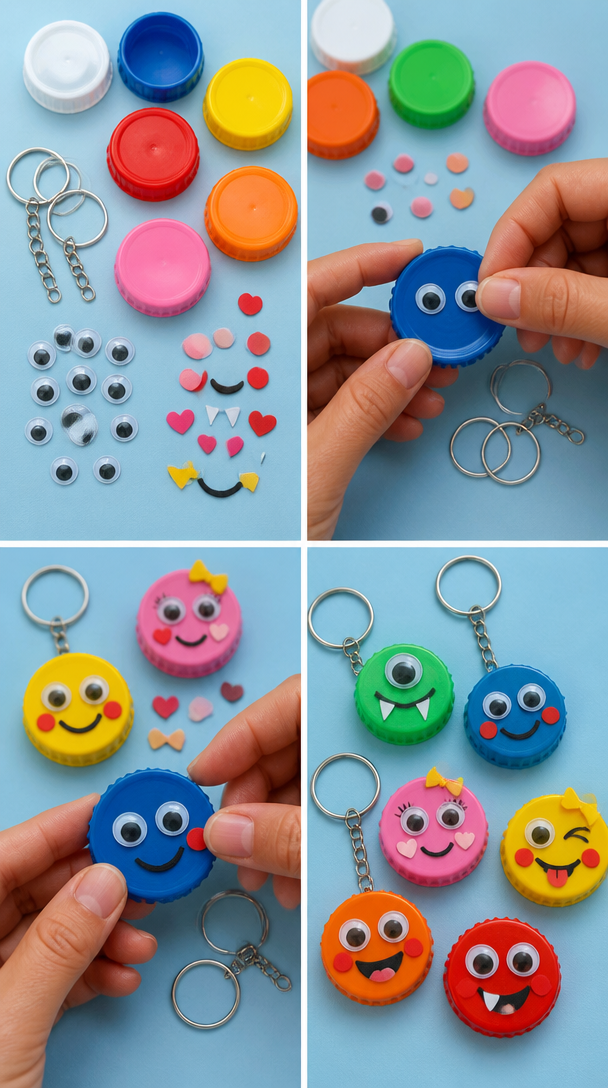
By inviting children to personalize these keychains, we also encourage self-expression. Each keychain tells a story, reflecting the unique personality and creativity of its maker. The act of choosing colors, shapes, and embellishments allows kids to explore their creativity freely, fostering a sense of pride in their creations. In the end, these colorful little treasures become not just practical items but keepsakes imbued with memories and feelings.
A Gentle Look at the Process
Creating bottle cap keychains unfolds as a gentle journey. As you gather your materials, feel the comforting weight of the caps in your hands. The sound of paints being stirred mixes with the whispers of colors coming to life. Movement flows naturally between decorating and assembling each piece. This project is not bound by strict rules; it invites creativity to flourish in a playful and relaxed way.
As children begin to paint or decorate, encourage them to engage with the colors and textures. The smooth brush against the cap, the soft crinkle of washi tape, or the satisfying snap of jump rings all add delightful sensory details to this heartfelt process. Each step, though simple, weaves together a rhythm of creativity, allowing young crafters to connect with their emotions and the world around them.
Materials You’ll Need
- Bottle caps (clean and dry, any colors work well)
- Acrylic paint or permanent markers (vibrant colors)
- Optional: Paintbrushes (if using paint)
- Jump rings (to attach to keychains)
- Keychain rings (available at craft stores)
- Decorative elements (stickers, washi tape, glitter, etc.)
- Pliers (for easy assembly of keychain rings)
- Clear coat spray or sealant (to protect designs, optional)
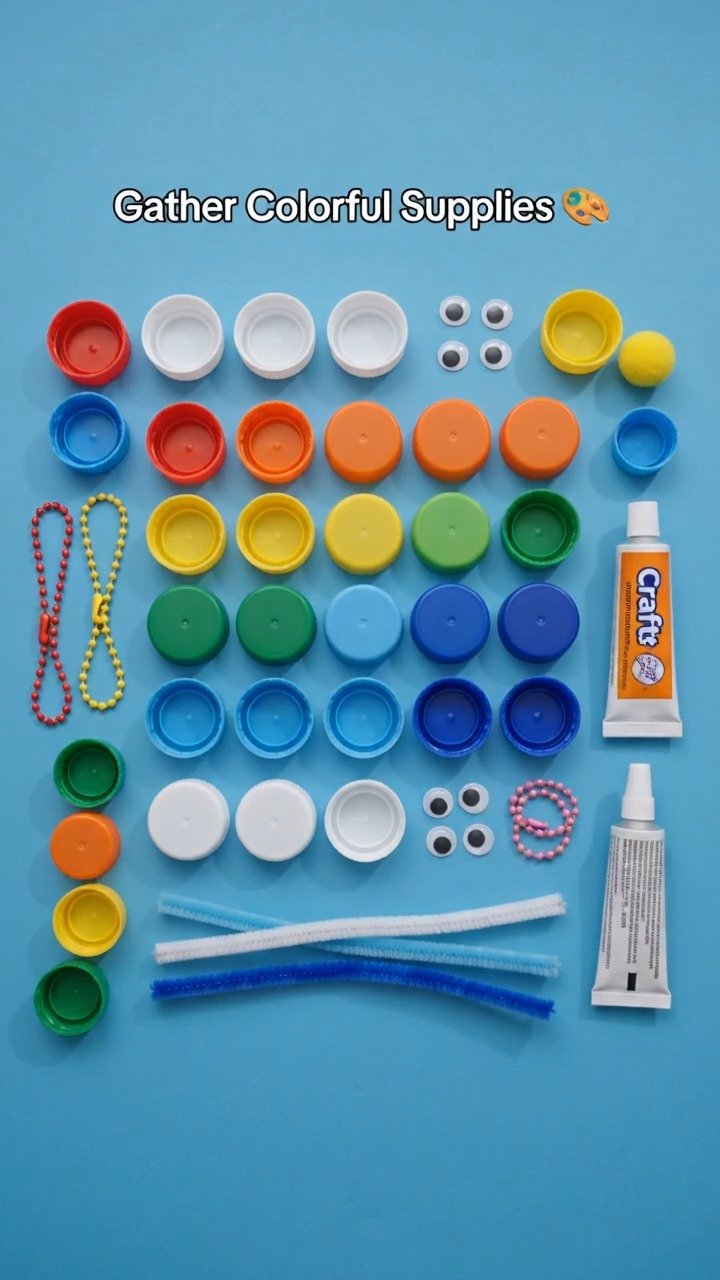
Gathering materials becomes part of the experience, and you may find that many are easy to discover in your home or local store. This simplicity invites kids to take part in the preparation, deepening their connection to the process and their creations.
Step-by-Step Directions
-
Begin by laying out all your materials. Surround yourself with colors that inspire you.
-
Choose a bottle cap and hold it in your hand. Feel its cool surface, and decide how you’d like to decorate it.

-
If using acrylic paint, gently shake the bottle and pour a small amount onto a palette or plate. Use a soft brush to apply the paint onto the cap. Let the brush glide smoothly to create even coverage.
-
Allow the first coat to dry for a few minutes. As the colors settle, enjoy watching as they transform the cap.
-
Once dry, add a second coat if desired to deepen the colors or add more intricate designs.
-
Decorate with stickers or washi tape. Let your imagination soar as you arrange them on your cap.
-
After decorating, let everything rest and dry thoroughly. This gives the designs time to set and keeps them vibrant.
-
Take a jump ring and use pliers to open it gently. Thread it through the top of your decorated cap.
-
Carefully attach the jump ring to a keychain ring, securing both ends tightly.
-
Step back and admire your colorful keychain! Each creation carries a piece of your personality and a sense of joy.
Enjoying the Finished Piece
The finished bottle cap keychains serve as joyful reminders of creativity and fun. They can be easily attached to backpacks, pencil cases, or keys, adding a colorful splash to everyday items. Each time a child picks up their keys or opens their bag, the keychain will evoke the warmth of their creative process and the time spent crafting.
These playful treasures can also be shared with friends or family, creating a sense of connection. A beautifully crafted keychain becomes a simple but heartfelt gift, sprinkled with the love and creativity of its young maker. Watching their eyes light up as they present their creation strengthens bonds and reinforces the joy of making.
Making This DIY Last
Caring for your new keychains will help keep their vibrant colors alive longer. Store them in a soft bag or a small box, away from harsh sunlight and moisture. This preserves the integrity of the decorations, shielding them from fading over time.
If you used paint, consider applying a clear coat spray over the initial designs. This additional layer protects against scuffs and adds a lovely sheen. Ensure the keychains are completely dry before moving them into storage, preventing any stickiness from ruining your hard work.
As children grow, they might enjoy revisiting these keychains, adding new touches or simply appreciating the memories attached to them. This project encourages an understanding of the value of taking care of something created with love.
Gentle Tips & Variations
-
Encourage children to explore various themes for their keychains. They might want to create a set based on favorite animals, colors, or seasons, allowing for both creativity and a sense of coherence.
-
For a tactile experience, consider incorporating fabric scraps or soft embellishments. Gluing small pieces of felt or cotton fabric can add a delightful texture.
-
Let kids brainstorm and sketch designs on paper before committing to the inside of the bottle caps. This can be a calming step, allowing them to visualize their ideas softly.
-
If using paints, try mixing colors to discover new shades together. The process of blending also becomes a playful experiment.
-
Explore different sizes and shapes of bottle caps to create an eclectic mix in a child’s collection, inspiring them to appreciate variety.
FAQs About Make playful bottle cap keychains that kids can personalize with colors and simple decorations for everyday fun. Perfect for your next craft day.
How do I clean the bottle caps before starting?
A gentle wash with soap and warm water is usually enough. Make sure to let them dry completely before beginning your project.
Can I use any kind of paint?
Acrylic paint works well because it is colorful and permanent when dry, but feel free to explore other types. Permanent markers are also great for easy detailing.
Are there alternatives to jump rings?
Absolutely! If you don’t have jump rings, you can use string or thin wire to attach your bottle caps to keychain rings.
What if my paint smudges?
If you catch it while it’s still wet, you can gently dab it with a cloth to clean it up. Allow painted caps to dry flat to prevent smudging once they are set.
Can older children help younger ones with this project?
Definitely! This project encourages teamwork and sharing ideas. Kids can inspire each other as they collaborate and learn from one another.
A Gentle Note Before You Go
As you wrap up your crafting session, take a moment to reflect on the process and its impact. Each keychain you create serves as a reminder of the simple joys of making. The bright colors, the loving touches, and the imagination behind each piece come together beautifully, weaving a narrative of creativity and connection.
Embrace the calm that comes with slowing down to craft. Each moment spent making these bottle caps is a chance to relish the present, drawing forth your inner artist. Encourage personal touches and the freedom to explore, allowing each creation to take shape quietly and meaningfully. In this shared space of creativity, cozy hands come together, crafting not just keychains but memories to cherish.
Print
Playful Bottle Cap Keychains
- Total Time: 15 minutes
- Yield: 1 keychain
- Diet: N/A
Description
Create fun and colorful bottle cap keychains that kids can personalize with paints and decorations for everyday joy.
Ingredients
- Bottle caps (clean and dry, any colors)
- Acrylic paint or permanent markers (vibrant colors)
- Paintbrushes (if using paint, optional)
- Jump rings (to attach to keychains)
- Keychain rings (available at craft stores)
- Decorative elements (stickers, washi tape, glitter, etc.)
- Pliers (for easy assembly of keychain rings)
- Clear coat spray or sealant (optional, to protect designs)
Instructions
- Begin by laying out all your materials. Surround yourself with colors that inspire you.
- Choose a bottle cap and hold it in your hand. Feel its cool surface, and decide how you’d like to decorate it.
- If using acrylic paint, gently shake the bottle and pour a small amount onto a palette or plate. Use a soft brush to apply the paint onto the cap.
- Allow the first coat to dry for a few minutes. Enjoy watching as the colors settle and transform the cap.
- Once dry, add a second coat if desired to deepen the colors or add intricate designs.
- Decorate with stickers or washi tape, arranging them on your cap as you wish.
- After decorating, let everything rest and dry thoroughly.
- Take a jump ring and use pliers to open it gently. Thread it through the top of your decorated cap.
- Carefully attach the jump ring to a keychain ring, securing both ends tightly.
- Step back and admire your colorful keychain! Each creation carries a piece of your personality.
Notes
Encourage kids to explore unique themes and variations in their keychain designs. Think about adding textures or incorporating mixed media for a richer tactile experience.
- Prep Time: 15 minutes
- Cook Time: 0 minutes
- Category: Craft
- Method: Crafting
- Cuisine: N/A