

Creating a Jeweled Mason Jar Lantern invites soft moments of serenity into our lives. The warm glow that radiates from these jars, adorned with colorful gems, dances like fireflies in the twilight, casting delicate reflections around the room. It’s a gentle reminder of the beauty in simple things, urging us to slow down and become mindful of the textures and colors wrapping around our fingers as we craft. Each jeweled piece transforms an ordinary jar into a vessel of warmth and creativity, creating a cozy ambiance that feels both personal and welcoming.
Why Make This Jeweled Mason Jar Lantern
Journeying through the creation of a Jeweled Mason Jar Lantern offers more than just a visual delight. This DIY project encourages a mindful approach to crafting, allowing us to embrace the moment while nurturing our inner artist. As we sift through colorful beads and feel them glide through our fingers, we engage our senses fully.
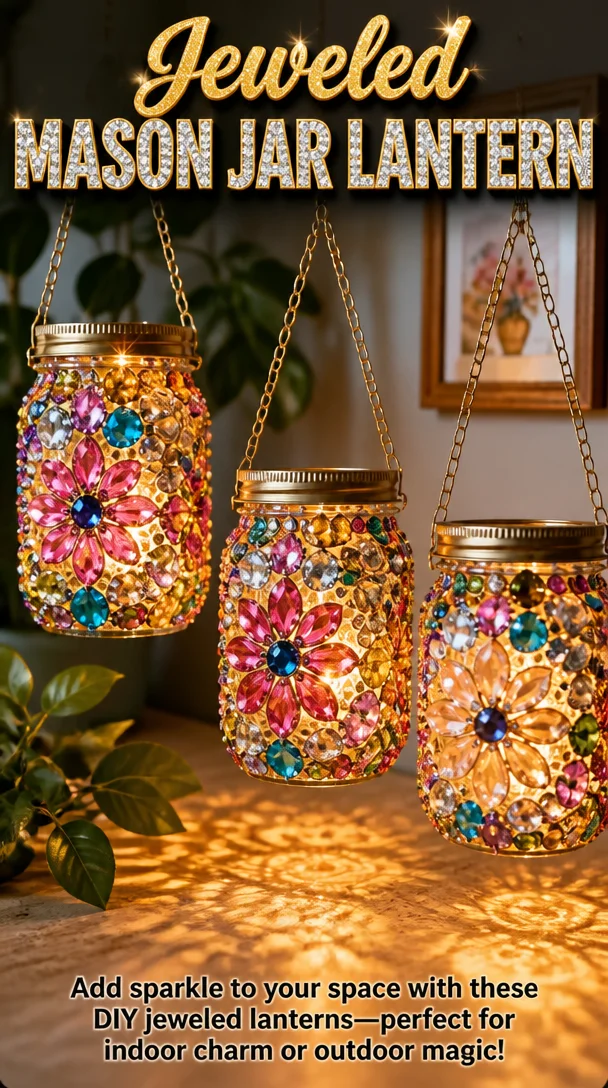
The act of gluing each gem onto the jar unfolds like a soft rhythm, grounding us in the present. The gentle stickiness of the glue and the satisfying click of a bead breaking free from its string transports us into a cocoon of coziness. We lose ourselves in this tranquil making moment, letting go of worries and finding joy in the simple act of creation.
Making this lantern reminds us that lighting up our spaces can ignite warmth within our hearts. It symbolizes intention and creating beauty from fragments, much like how we build our lives one gentle step at a time.
A Gentle Look at the Process
Preparing to make your Jeweled Mason Jar Lantern invites a flow that feels almost meditative. Take a moment to settle into your crafting space, surrounded by the materials that will soon become transformed into something enchanting. Before you begin, notice the atmosphere; perhaps the soft light of the late afternoon sun is filtering through your window, casting a soft glow that dances playfully on your workspace.
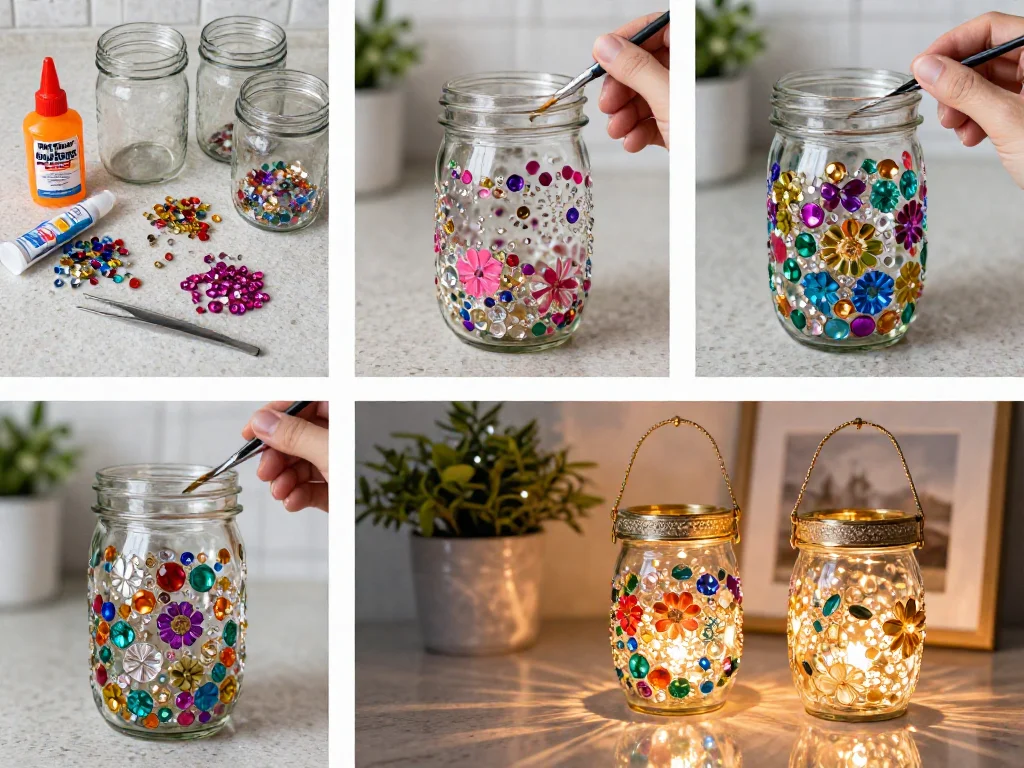
The sounds of the beads clinking softly together echo in the background as you gather your supplies. You will find yourself drawn to the textures, from the smooth surfaces of the mason jar to the delightful coolness of the jewels. As you start arranging and attaching, the rhythmic motion of gluing and placing creates a calming flow, becoming a simple dance between your hands and the materials.
Materials You’ll Need
- Mason jar (any size works, but larger jars create a more dramatic effect)
- Craft glue or E6000 glue (strong and versatile)
- Decorative jewels or beads (find a variety of shapes and colors)
- Paintbrush (for spreading glue)
- Twine or ribbon (optional for wrapping around the jar)
- Battery-operated tea light or small candle (for illumination)
- Scissors (for trimming twine or ribbon)
Gathering these simple supplies offers a gentle gathering of colorful possibilities. The beads can often be found at local craft stores, and the other materials might be already tucked away somewhere at home.
Step-by-Step Directions
-
Prepare Your Workspace
Clear a comfortable area where you can spread out your materials. Take a moment to enjoy the softness of fabric or surfaces you work on.
-
Choose Your Jewels
Select a mixture of decorative jewels, letting your intuition guide you. Feel how each one slides through your fingers. -
Apply Glue
Using a paintbrush, apply a thin layer of glue to a small area of the mason jar. The sticky surface should feel smooth, inviting each jewel to find its place. -
Place the Gems
Begin placing your jewels onto the glued area. Savor the tiny, satisfying click as each piece adheres to the glass. Move at a pace that feels right for you. -
Continue Gluing
Work your way around the jar, applying glue and gems in small sections. Enjoy the way the color and light intertwine as you build your design. -
Wrap with Twine (Optional)
If you choose, tie twine or ribbon around the neck of the jar. Feel the texture of the fibers as you create a warm, inviting finish. -
Allow to Dry
Set your lantern aside and allow the glue to dry completely. This waiting period can be a lovely time to contemplate the transformation of your jar. -
Add a Light Source
Once dry, place a battery-operated tea light or small candle inside. Enjoy the gentle glow that begins to illuminate your beautifully crafted piece. -
Find Your Spot
Choose a special place for your lantern to be displayed. Whether on a table or a windowsill, let the light and colors fill the space with warmth.
Enjoying the Finished Piece
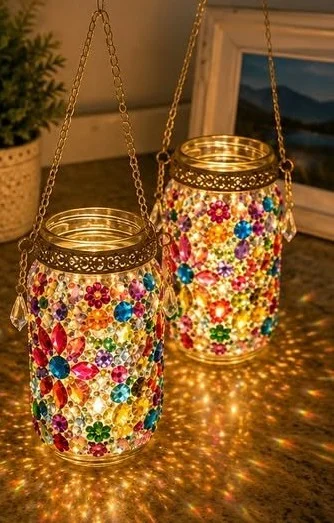
Your Jeweled Mason Jar Lantern stands as a testament to the calm and creativity embodied in the making process. As the gentle light flickers within, it creates a cozy atmosphere that invites relaxation and reflection. Whether used during a quiet evening with a book or as a centerpiece for gatherings, it brings a touch of warmth and beauty to any setting.
Place it near your favorite nook or use it to adorn your dining table. The warm glow cultivates a sense of peace, reminding you to breathe, unwind, and share the light with loved ones. Each time you catch a glimpse of it, let it symbolize the loving care imbued in its creation.
How to Store or Reuse Jeweled Mason Jar Lantern
Taking care of your Jeweled Mason Jar Lantern ensures its longevity and continued enjoyment. If you wish to store it, choose a soft, padded space where it can stay protected from being bumped or scratched. You may decide to keep it covered in a soft cloth, shielding it from dust while allowing it to breathe.
When the season calls for it, you can incorporate the lantern into new themes. With the switch of lights or placement amongst other decor, allow it to evolve with your home and crafting desires. Its essence remains versatile, ready to shine in any corner that needs a touch of reassurance and joy.
Gentle Tips & Variations
-
Color Harmony: As you make your lantern, consider themes. A palette of blues and greens might evoke calm waters, while warm yellows and reds can hint at a sunset. Let color hold meaning for you.
-
Embellished Touches: Add charms, ribbons, or even dried flowers to the outside for a more personal expression. Each added detail tells a story and connects to your unique style.
-
Seasonal Changes: Use seasonal decor elements, like pinecones in fall or dried flowers in summer, to switch up the inner filling of your lantern. It keeps the ambiance fresh and delightful.
-
Gift a Lantern: Consider making an additional lantern to share with a friend or loved one. The act of creation feels even more fulfilling when it brings joy to someone else.
FAQs About Jeweled Mason Jar Lantern
Q: Can I use regular glue instead of craft glue?
A: While regular glue can work, craft glue is specially designed for projects like this. It dries clear and provides a strong bond for more delicate embellishments.
Q: What if I don’t have decorative jewels?
A: No worries! You can use buttons, colorful stones, or even bits of colored paper for a mosaic look. The key is to enjoy the process of creating regardless of the materials.
Q: How do I clean my lantern?
A: Gently dust the lantern with a soft cloth. For deeper cleaning, avoid soaking it. Instead, lightly wipe with a damp cloth, being cautious around the jewels.
Q: Can I use a real candle instead of a battery-operated one?
A: If you choose to use a real candle, ensure it is placed safely in the center of the jar. Be cautious, as the glass can get hot and could be a fire hazard.
Q: How do I make sure the jewels stay in place?
A: Allow plenty of time for the glue to dry completely before handling. If any gems feel loose, you can apply a drop of glue to secure them snugly.
A Gentle Note Before You Go
As you reflect on the creation of your Jeweled Mason Jar Lantern, take a moment to appreciate the simple beauty of the journey. This project allows for natural improvisation and endless creativity, mirroring the ever-changing seasons of our lives. Remember, the act of creating is as meaningful as the lantern itself.
Embrace the light it brings, and carry this comforting sense of calm with you into your days ahead. Let each flicker be a reminder of the warmth you can craft with your own hands. Keep making, keep finding quiet moments, and let your creativity bloom.
Print
Jeweled Mason Jar Lantern
- Total Time: 15 minutes
- Yield: 1 lantern
- Diet: N/A
Description
Create a beautiful Jeweled Mason Jar Lantern that adds warmth and serenity to your space with colorful gems.
Ingredients
- Mason jar (any size)
- Craft glue or E6000 glue
- Decorative jewels or beads
- Paintbrush
- Twine or ribbon (optional)
- Battery-operated tea light or small candle
- Scissors
Instructions
- Prepare your workspace by clearing a comfortable area.
- Choose a mixture of decorative jewels intuitively.
- Apply glue using a paintbrush to a small area of the mason jar.
- Place your jewels onto the glued area, securing each piece.
- Continue working around the jar, applying glue and gems.
- Wrap twine or ribbon around the neck of the jar if desired.
- Allow the glue to dry completely.
- Add a battery-operated tea light or small candle inside.
- Find a special place for your lantern to display it beautifully.
Notes
Consider using seasonal decor elements to keep your lantern fresh and inviting.
- Prep Time: 15 minutes
- Cook Time: 0 minutes
- Category: Craft
- Method: DIY Crafting
- Cuisine: N/A