

The gentle clink of metal cans as you gather them, the soft rustle of twine against your fingers—the journey of creating tin can hanging planters begins with a simple touch. Light streams through windows, casting delicate shadows that dance with your movements as you connect materials and ideas. Each step along the way brings a sense of warmth, allowing you to breathe deeply as you transform ordinary objects into something inviting for your space. This mindful project not only nurtures your creativity but also embraces the beauty of slow making.
The Heart Behind This DIY
Embarking on the journey of crafting tin can hanging planters offers more than just a decorative piece for your home. It is an experience rich in sensory delight. The rhythmic motions of measuring, cutting, and tying help to anchor you in the present moment. You notice the coolness of the metal as you shape it, the soft tug of the twine between your fingers, and the comforting sight of plants nestled within.
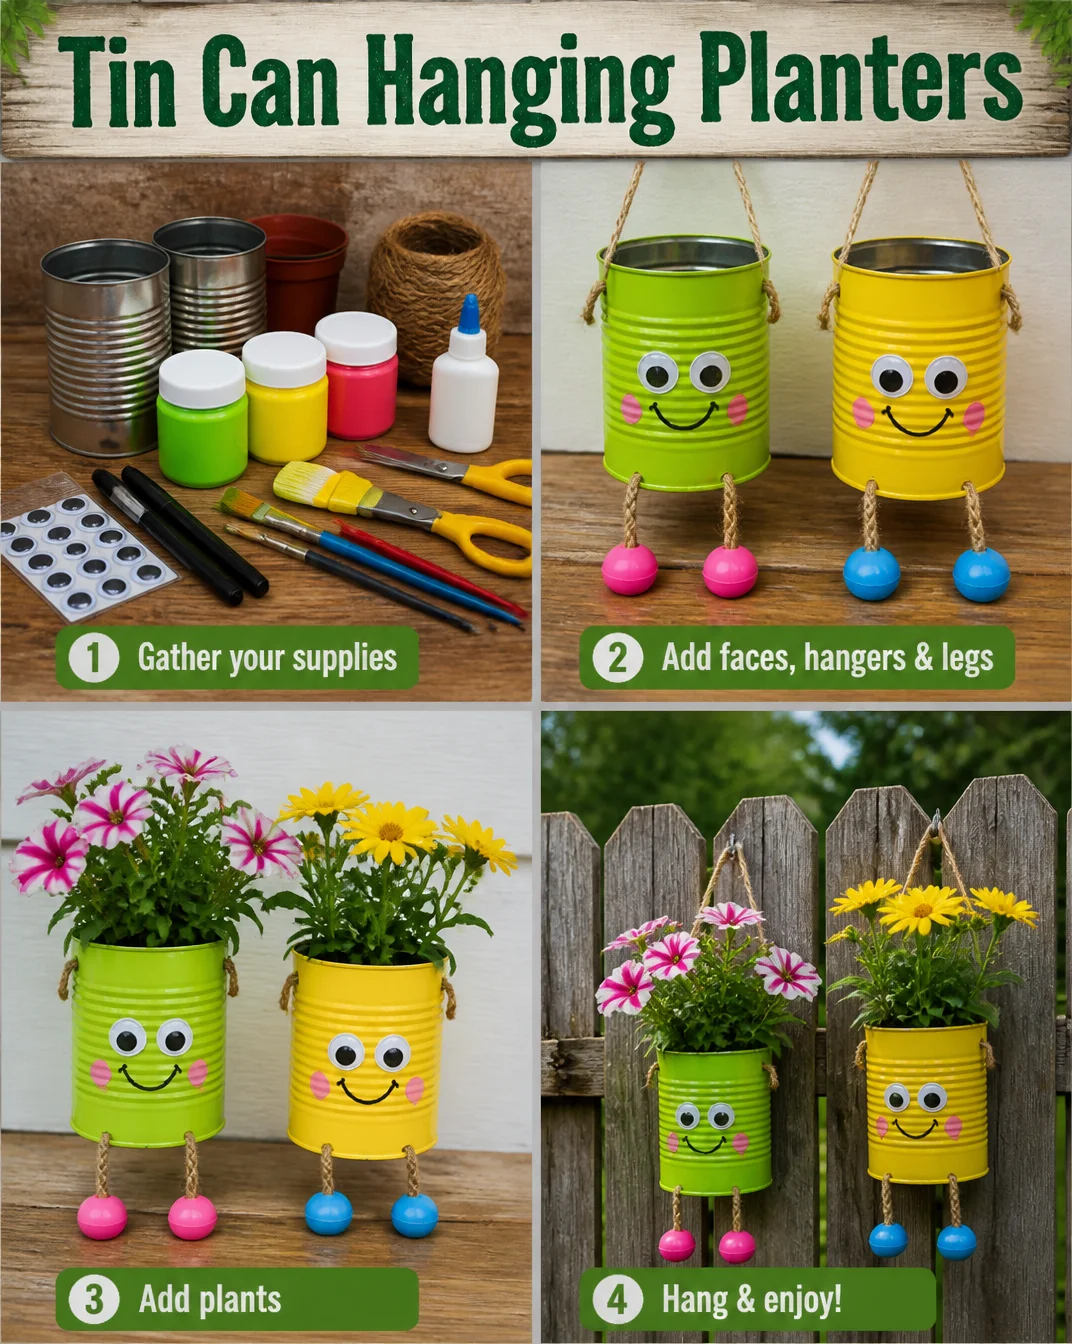
Creating these planters gently encourages you to engage fully with your materials. Each detail invites you to slow down, breathe, and check in with yourself. As you work, you provide a nurturing space not only for the plants but also for your own thoughts and creativity to flourish. The act of transforming tin cans becomes a soothing ritual, a chance to find calm amidst your day. You cherish the sights, sounds, and sensations that come with each step, making the entire process a fulfilling one.
How This DIY Comes Together
The flow of making tin can hanging planters feels like sinking into a warm bath of creativity. Each movement unravels a new layer of joy and discovery. Begin by feeling the sturdy texture of the cans and imagining how they will cradle vibrant greenery. As you prepare your workspace, let the sounds of snipping twine and tapping metal fill your space, creating a gentle symphony of crafting.
Gather your materials with intention, knowing that each piece plays a role. The rhythm of your hands as they reach for tools and supplies sets the tone for your experience. While you cut, paint, or wrap, each action becomes a part of a soothing dance. You observe the colors of your chosen plants and how they will complement the metallic sheen of the cans. This sensory symphony prepares you for the delightful moments ahead, where creation meets meditation.
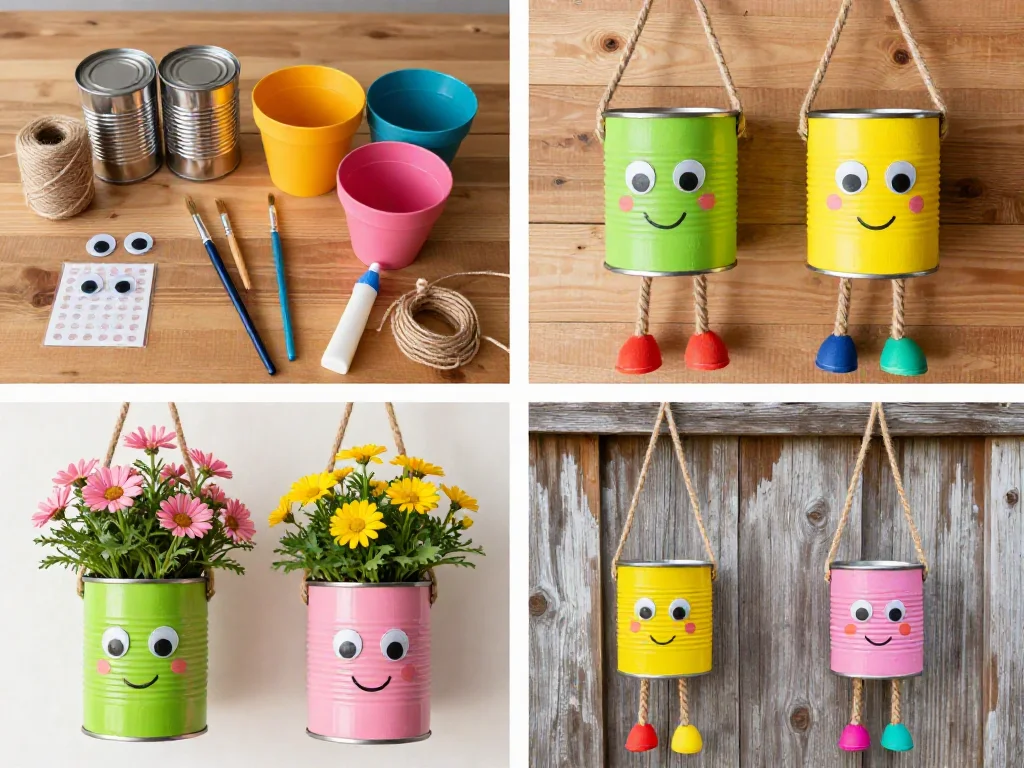
Materials You’ll Need
- Clean tin cans (any size)
- Twine or rope (natural fiber is lovely)
- Hammer and small nail or a drill (for drainage holes)
- Paint or washi tape (optional for decoration)
- Potting soil
- Small plants or seedlings (herbs, succulents, or flowers)
These materials are easy to find, and you may already have some at home. Feel free to substitute materials as your creativity guides you. Take a moment to appreciate each item, visualizing how they will come together in your hands.
Step-by-Step Directions
-
Begin by rinsing your tin cans to remove any labels. Feel the cool metal against your skin as you prepare them for use.
-
Use a hammer and nail or a drill to create a few drainage holes at the bottom of each can. Hear the gentle tap as you make small indents, preparing for the life that will thrive within.

-
If you wish to decorate your cans, now is the time to add paint or washi tape. Let the brush glide smoothly across the surface, or layer tape in patterns you find appealing.
-
Once they are dry, fill each can with potting soil, leaving room for your plants. Notice the rich, earthy scent as you scoop and pour, creating a cozy environment for growth.
-
Gently add your plants, ensuring that their roots are well secured in the soil. Feel the softness of the leaves as you position them for optimal sunlight.
-
Cut lengths of twine based on how low you want the planters to hang. Securely tie the twine around the can, creating a handle that is both strong and pleasing to touch.
-
Find a sunny spot in your home to display your new hanging planters. As you hang them, let yourself appreciate the beauty of your handiwork and the greenery they bring to your space.
Enjoying the Finished Piece
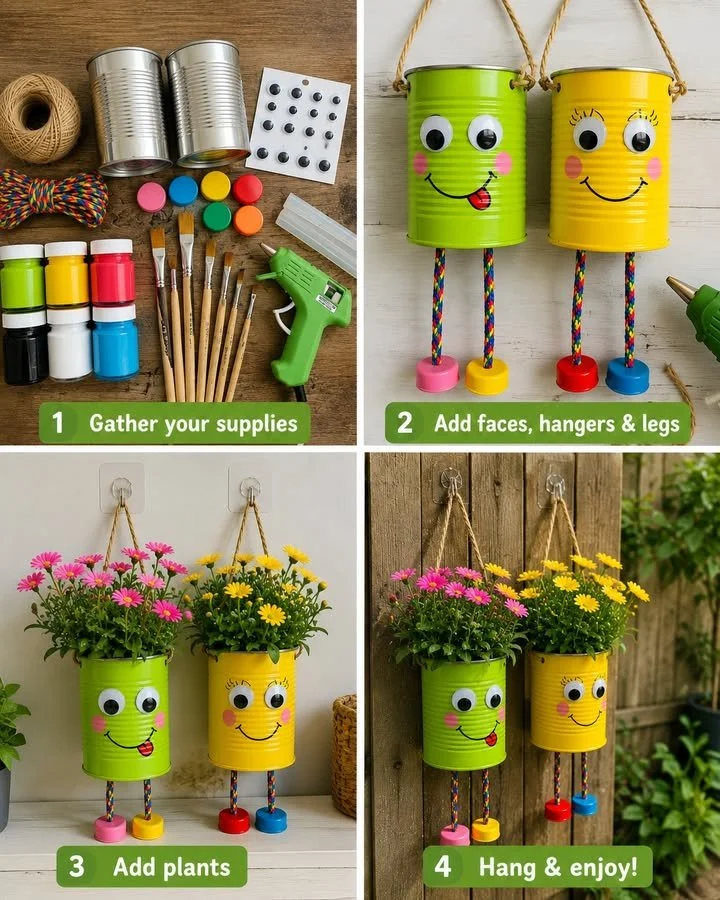
Your tin can hanging planters now have a home, ready to enhance your space beautifully. Position them by a window or outside on a balcony, allowing them to catch the light and breathe life into your environment. Each time you glance at them, you are reminded of the calming experience of creating and nurturing.
These planters offer not just visual appeal but functional beauty. They invite herbs for your kitchen, adding freshness to your meals, or vibrant flowers that brighten your day. As the plants grow, they become a witness to the passing seasons. Your hands crafted each piece, making them uniquely personal replicas of your creativity and care.
Making This DIY Last
To ensure your tin can hanging planters remain a part of your home for years to come, consider the following gentle practices. Store them in a cool, dry place if you need to keep them out of sunlight for a time. When they are not in use, empty the soil to prevent deterioration and prepare them for reuse.
If your plants outgrow their tin homes, you can easily transplant them into larger pots. You might even enjoy redecorating the cans, keeping the project fresh and engaging. Reflecting on their journey will remind you of the peaceful moments you created during their transformation.
Calm Customization Ideas
Here are a few gentle invitations to customize your tin can hanging planters further:
-
Experiment with different colors or textures of twine, perhaps weaving in ribbons or fabric for a unique touch. Each variation adds a layer of personalization.
-
If you’re feeling playful, try creating a theme for your planters. Select plants that evoke a certain mood or reflect elements of your favorite seasons.
-
Consider adding small decorative pieces, like stones or pebbles at the bottom of the can, to enhance drainage and add visual texture.
-
Switch out your plants seasonally, celebrating the changes in nature and your environment. This keeps your project feeling fresh and alive.
-
Invite friends for a cozy crafting session, sharing supplies and ideas. The experience can deepen connections while offering a space for creativity.
FAQs About Tin Can Hanging Planters
Can I use any type of plant for the tin can planters?
Yes, most small plants, like herbs, succulents, or flowering plants, work beautifully. Choose plants that are suited for the amount of light in your chosen spot.
How long will the planters last?
With care, these planters can last for many seasons. The longevity depends on how they are treated and the materials used. The metal cans are sturdy, while the twine may fade over time from sun exposure.
Do I need to worry about drainage?
Creating drainage holes is essential to prevent overwatering, which may cause root rot. The holes ensure excess water drains out, allowing your plants to thrive.
Can I hang them inside?
Absolutely! They make lovely indoor decor, brightening up spaces near windows or in corners where greenery can make an impact.
What if I change my mind about the design?
Feel free to reinvent and redecorate your planters as desired. Painting over them or wrapping with new material is simple and a fun way to refresh your indoor garden.
A Gentle Note Before You Go
As you reach the end of this journey, take a moment to reflect on the tranquility you experienced while making your tin can hanging planters. Each layer of creation is a chance to weave calm into your world. Cherish the process just as much as the outcome, celebrating the skills you have honed and the space you have created for growth. Allow the soothing nature of this craft to linger in your mind, guiding you into many more moments of cozy creativity.
Print
Tin Can Hanging Planters
- Total Time: 15 minutes
- Yield: 4 planters
- Diet: N/A
Description
Transform tin cans into beautiful hanging planters that add a touch of greenery to your home. This DIY project is not only creative but also calming.
Ingredients
- Clean tin cans (any size)
- Twine or rope (natural fiber is lovely)
- Hammer and small nail or a drill (for drainage holes)
- Paint or washi tape (optional for decoration)
- Potting soil
- Small plants or seedlings (herbs, succulents, or flowers)
Instructions
- Begin by rinsing your tin cans to remove any labels.
- Use a hammer and nail or a drill to create a few drainage holes at the bottom of each can.
- If you wish to decorate your cans, now is the time to add paint or washi tape.
- Once they are dry, fill each can with potting soil, leaving room for your plants.
- Gently add your plants, ensuring that their roots are well secured in the soil.
- Cut lengths of twine based on how low you want the planters to hang.
- Find a sunny spot in your home to display your new hanging planters.
Notes
Feel free to substitute materials as your creativity guides you. Store planters in a cool, dry place when not in use.
- Prep Time: 15 minutes
- Cook Time: 0 minutes
- Category: Craft
- Method: DIY Crafting
- Cuisine: N/A