

Creating a DIY Flower Crescent Moon feels like capturing a soft moment of twilight in your hands. As you gather your materials and let the floral whispers of colors and textures weave their magic, you invite a sense of calm into your space. The gentle movement of your fingers, handling petals and clay, becomes a mindful dance that connects you to the energy of creation. Each stroke of your hand carries intention, bringing forth a serene piece that not only brightens your room but also soothes your spirit.
The Heart Behind This DIY
Crafting a DIY Flower Crescent Moon brings about a gentle reminder to slow down and savor the beauty around us. This project encapsulates the essence of mindfulness, allowing you to focus on the delicate details of each flower and curve while creating something truly special. Engaging with natural materials fosters a connection to the earth, inviting the soft scents and textures to calm your mind. As you blend colors and shapes, you become part of a quiet rhythm, drawing inspiration from nature.

The act of creating this piece helps cultivate a peaceful environment. You will find that each moment spent shaping the moon becomes an opportunity for reflection. The graceful curve of the crescent moon serves as a reminder of the cycles we experience in life, echoing the beauty in change. In this cozy creative space, you may discover that the act of making becomes just as essential as the finished artwork itself.
The Flow of Making DIY Flower Crescent Moon
Imagine the soft sound of your chosen tools, the gentle brushing of flower petals against your fingers, and the comforting scent wafting from an array of materials. Creating your DIY Flower Crescent Moon unfolds like a calm meditation. You will begin by gently preparing each piece, allowing yourself to be present with each step.
As you prepare, think about the textures you will work with and how they feel in your hands. The smoothness of air-dry clay contrasts with the delicate softness of dried flowers. Visualize the finished piece, but let the journey of crafting hold your attention. With every detail, each element comes together harmoniously, creating a rhythm that guides you through the process.
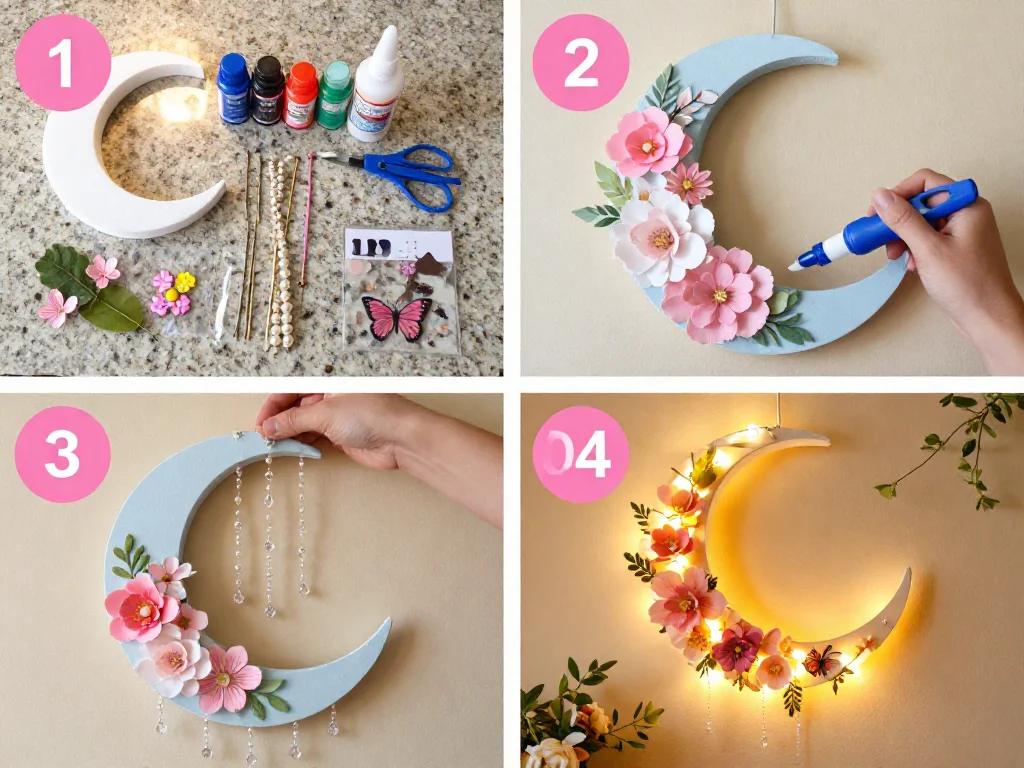
Materials You’ll Need
Gather these simple supplies, each one handpicked for ease and comfort during your creation:
- Air-dry clay (easy to find at craft stores)
- Dried flowers (like lavender, rosemary, or tiny daisies)
- A small rolling pin or smooth glass bottle for flattening clay
- A craft knife or sharp tool for cutting
- A bowl of water (to soften the clay)
- Optional: paint or metallic accents for added detail
- Optional: a gentle adhesive or glue for securing flowers
As you collect these items, feel the individual textures and notice their colors. Each piece brings a unique energy to your project, which reflects the beauty in variety.
Step 1: Prepare the Clay
Begin by kneading your air-dry clay in your hands. Feel its coolness as it warms up. This step helps create a soft, pliable texture, ready for shaping.
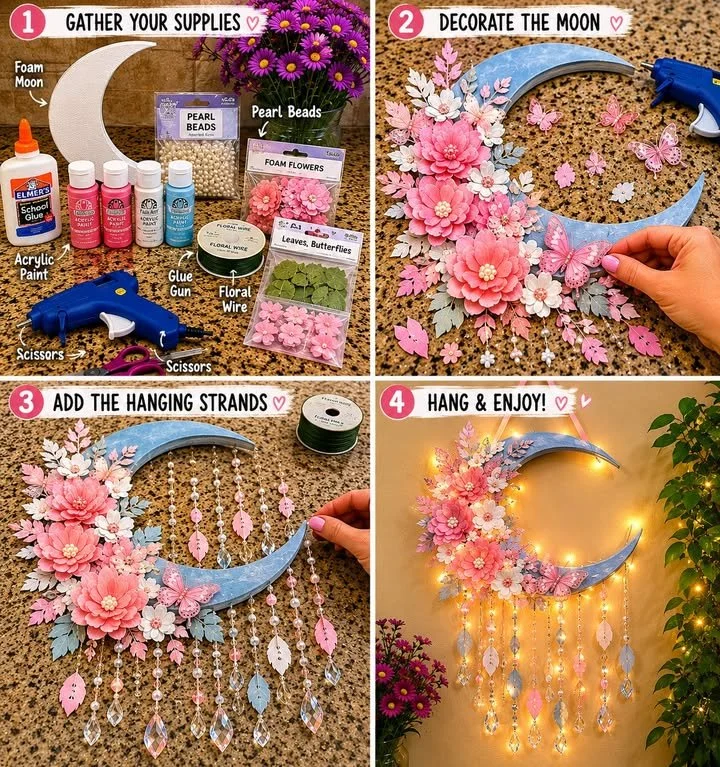
Step 2: Shape the Crescent
Take a small portion of clay and form it into a crescent moon shape. Aim for a smooth curve, one that feels balanced in your hands. An intentional sense of design emerges as you mold and press the edges.
Step 3: Roll Out the Clay
Using a small rolling pin or a smooth glass bottle, roll out another piece of clay into an even thickness. Allow the clay to maintain softness, ensuring it remains workable. The rhythmic motion of rolling can feel soothing, like kneading dough.
Step 4: Cut Out Flowers
Once flattened, use a knife to cut out shapes for your flowers. You might choose simple circles, petals, or even leaves. Think about the flowers you plan to use. As you create each piece, listen to the soft sound of the knife against the clay.
Step 5: Attach the Flowers
With the water from your bowl, lightly moisten the back of each flower piece before placing them on the crescent moon. Press gently, allowing them to adhere without losing their delicate form. This is where you can be playful, arranging the flowers how you feel they should be.
Step 6: Allow to Dry
Set your flower crescent moon in a safe and quiet place, letting it dry completely as instructed on the clay package. This pause is an invitation to breathe deeply and reflect on your work.
Using DIY Flower Crescent Moon in Everyday Life
Your DIY Flower Crescent Moon serves many purposes, acting as a charming accent in your home or a thoughtful gift for someone you cherish. Display it on a shelf, where the light dances off its textures, creating soft shadows that shift throughout the day. Alternatively, find a peaceful corner where it can radiate calm, perhaps near a potted plant or softly framed photos.
This piece is not just decorative; it can be a source of comfort during your daily rituals. Place it on your bedside table as a reminder to pause and reflect before sleep or use it as a focal point during moments of meditation or grounding.
Caring for Your Finished DIY
To maintain the beauty of your Flower Crescent Moon, store it in a dry place away from direct sunlight or moisture. This will help preserve the vibrant colors of the dried flowers and the integrity of the clay.
If dust accumulates, gently wipe it away with a soft cloth. This ensures that your crescent moon remains a fresh symbol of the creativity you poured into it.
Gentle Tips & Variations
As you become familiar with this project, consider these invitations to personalize your creation:
- Try using different flower combinations to reflect the seasons. Spring blossoms, summer wildflowers, or autumn foliage all bring unique joys.
- Experiment with colors. Instead of leaving the clay its natural hue, consider painting it in soft pastels or bold tones, adding more texture and character.
- Use natural clay dye if you seek more earthy tones. This can deepen the sensory experience of your making.
- Create a series of crescent moons in various sizes, celebrating the connections between them and the phases of your own journey.
FAQs About DIY Flower Crescent Moon
Can I use fresh flowers instead of dried ones?
Fresh flowers can be beautiful, but they tend to wilt and decay. Dried flowers hold their shape and color longer, making them a more suitable choice for lasting art.
How long does the clay take to dry?
Typically, air-dry clay takes about 24 hours to dry completely, depending on thickness and humidity. It’s always best to refer to the manufacturer’s guidelines based on your specific clay.
What if my crescent moon cracks while drying?
If cracks appear, you might be working with clay that was too dry or not kneaded enough at the beginning. You can use a bit of water to smooth over small cracks, gently melding them together.
Can I use this method to create other shapes?
Absolutely! This technique works wonderfully for a wide range of designs. Feel free to explore different shapes that inspire you.
How can I add twinkle lights to my crescent moon?
To incorporate twinkle lights, create a small hole in the back of the moon when shaping the clay. Once dry, you can insert tiny lights, creating a warm glow that enhances its charm.
A Gentle Note Before You Go
Creating your DIY Flower Crescent Moon is more than just making—it’s a journey of connection and reflection. Allow the process to nurture your creativity and expand your awareness of beauty in simple things. Every time you gaze at your crescent moon, remember the quiet moments of gentleness within your craft. Savor the experience, and let the tranquility extend into your daily life, echoing the dappled light of dusk that inspired it.
Print
DIY Flower Crescent Moon
- Total Time: 1455 minutes
- Yield: 1 moon
- Diet: N/A
Description
Capture the beauty of twilight with a handcrafted flower crescent moon, perfect for home decor or as a thoughtful gift.
Ingredients
- Air-dry clay
- Dried flowers (like lavender, rosemary, or tiny daisies)
- A small rolling pin or smooth glass bottle
- A craft knife or sharp tool
- A bowl of water
- Optional: paint or metallic accents
- Optional: adhesive or glue
Instructions
- Prepare the clay by kneading it in your hands.
- Shape a small portion of clay into a crescent moon.
- Roll out another piece of clay to an even thickness.
- Cut out shapes for your flowers using the craft knife.
- Attach the flower pieces to the crescent moon with water.
- Allow to dry completely in a safe place.
Notes
Personalize your creation using different flower combinations or colors. Store in a dry place away from direct sunlight to maintain its beauty.
- Prep Time: 15 minutes
- Cook Time: 1440 minutes
- Category: Craft
- Method: Crafting
- Cuisine: N/A