

japanese cheesecake in rice cooker might sound a little odd at first, but hear me out. If you love fluffy, jiggly cheesecake that melts on your tongue, your rice cooker is about to become your secret baking buddy. I started doing this on a hot day when I refused to turn on the oven, and I never looked back. The texture is cloud-like, the process is unfussy, and cleanup is easy. If you’ve ever been scared of water baths or finicky baking, this method will calm your nerves and reward you with pure cheesecake joy. 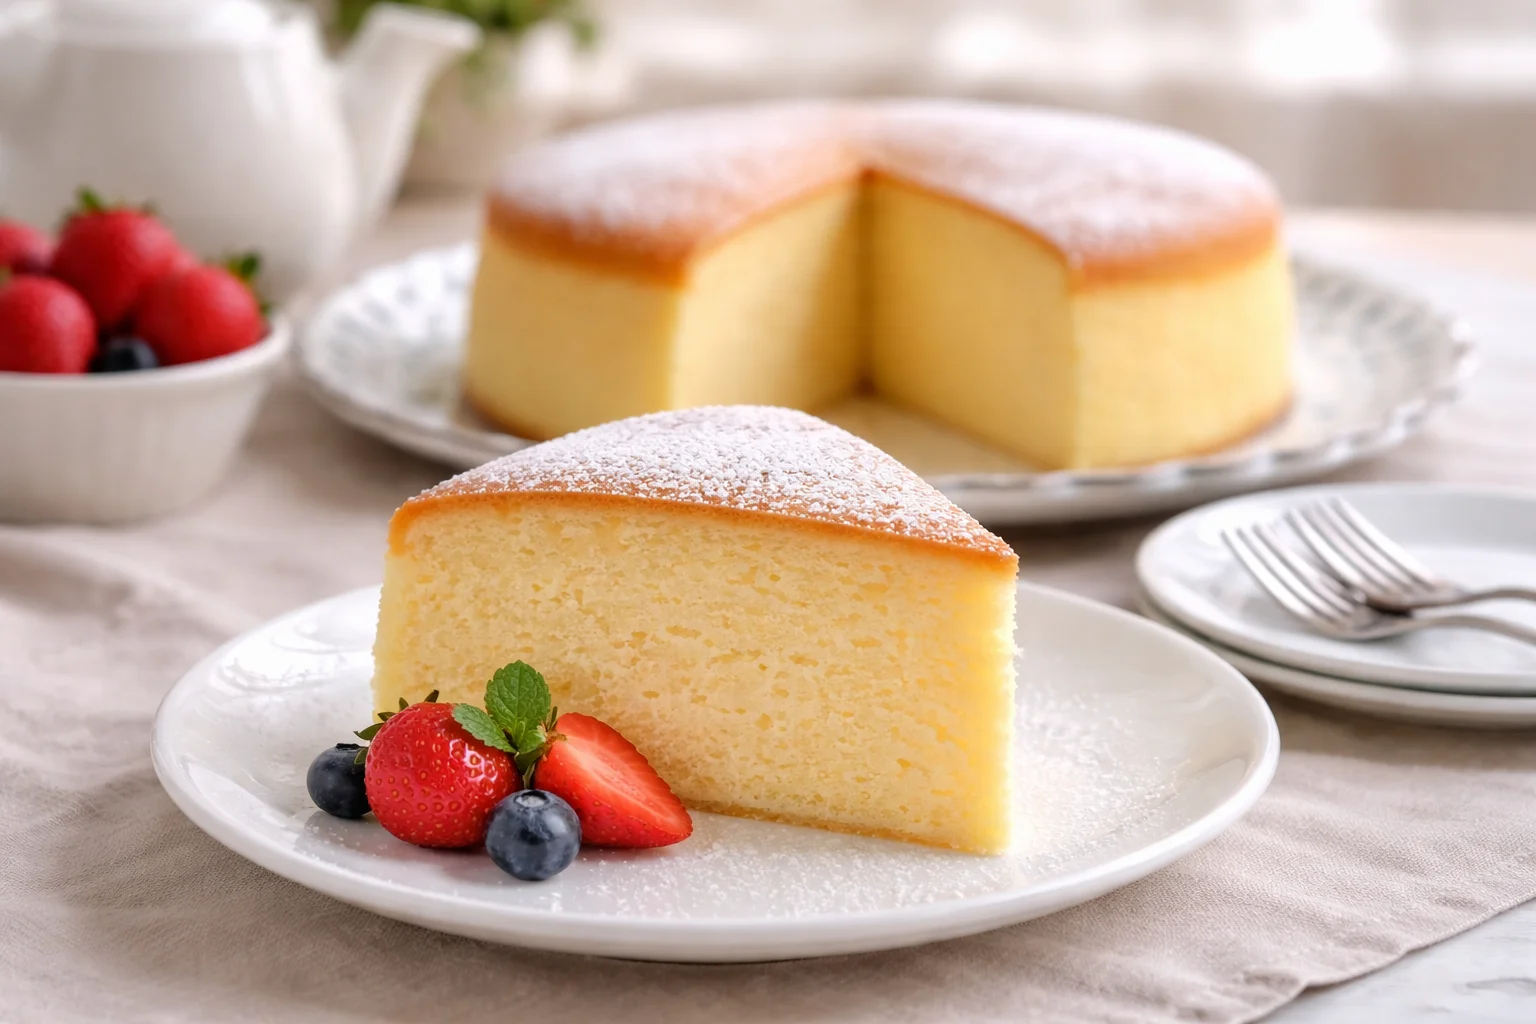
WHY USE RICE COOKER TO BAKE JAPANESE CHEESECAKE
Let’s be real. Oven baking can feel intimidating, especially with a delicate cake like a Japanese cheesecake. The rice cooker solves that. It creates a steamy, gentle environment that acts like a built-in water bath. The result is that signature tremble without all the balancing acts with boiling water.
Another perk is convenience. You pour the batter in, press a button, and walk away. No fiddling with temperatures or rotating pans. The heat is even, the bowl is snug, and the cheesecake cooks slowly and steadily. That low, moist heat is what keeps the crumb tender and prevents cracking.
It’s also perfect for small kitchens. If you’re in a dorm, a tiny apartment, or just don’t feel like heating up the whole house, the rice cooker version is a lifesaver. Energy-wise, it’s efficient. Hand-wise, it’s mostly hands off.
When friends ask what recipe I recommend for a stress-free first bake, I point them straight to this method and say it with a smile: try the Deliciously Fluffy Japanese Cheesecake in Rice Cooker Made Easy and thank me later.
I was skeptical, but the rice cooker did all the hard work. The cake came out springy, light, and unbelievably smooth. My family thought I bought it from a bakery.
Bonus tip: make a parchment sling for easy lifting, and your cake will come out clean as a whistle. 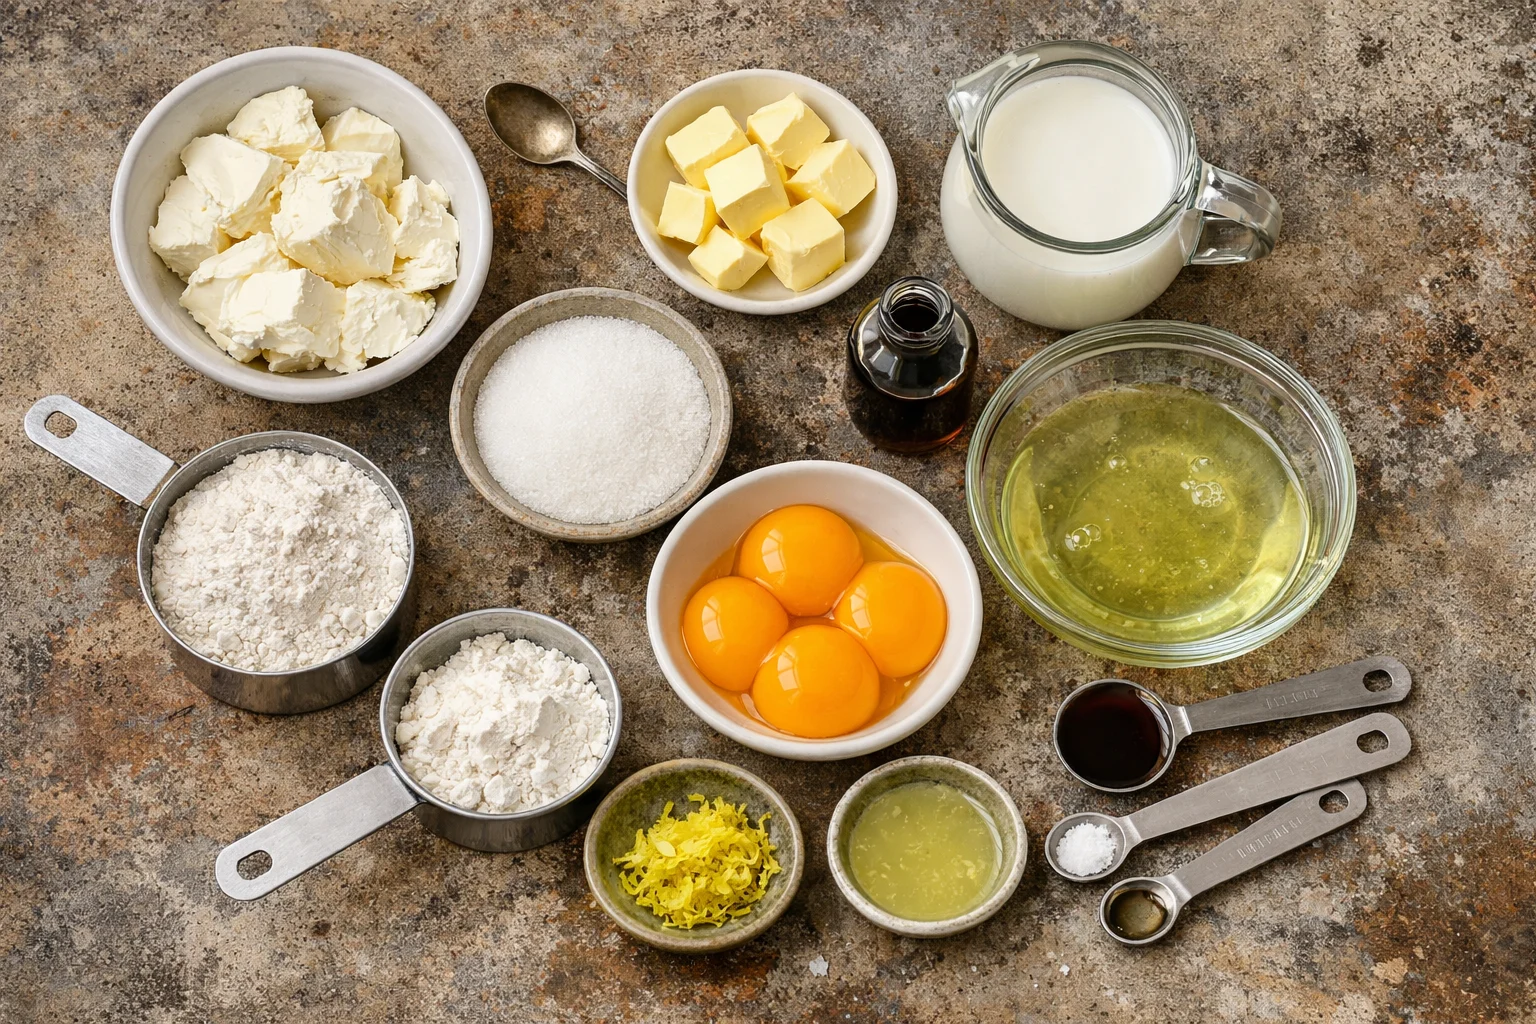
DO I NEED A SPECIAL RICE COOKER TO MAKE JAPANESE CHEESECAKE?
Short answer: not really. A standard rice cooker with a nonstick inner pot works fine. If your cooker has a Cake or Bake setting, great. If not, the regular White Rice cycle typically does the job with repeated cycles until done. The key is capacity and stick prevention.
Here’s what helps:
Capacity: A 5.5-cup rice cooker is perfect for a small cheesecake. A 10-cup cooker can handle a bigger batch, but the cake may be flatter unless you scale the recipe. Try to fill the pot no more than two-thirds to prevent overflow.
Nonstick pot: Essential for easy release. Line the bottom with a round of parchment and lightly grease the sides. If your pot isn’t nonstick, definitely use a parchment collar.
Fuzzy logic or simple: Both work. Fuzzy logic models heat more evenly, but simple cookers still deliver. You may just need an extra cycle.
Brand differences: Zojirushi, Tiger, Toshiba, Panasonic, and Cuckoo models are all capable. Times may vary slightly, so rely on the toothpick test and jiggle test more than the clock.
If you’re in a baking mood and want a cute twist for later, this bear swiss roll with cheesecake filling pairs perfectly with leftover cream cheese and makes an adorable gift. 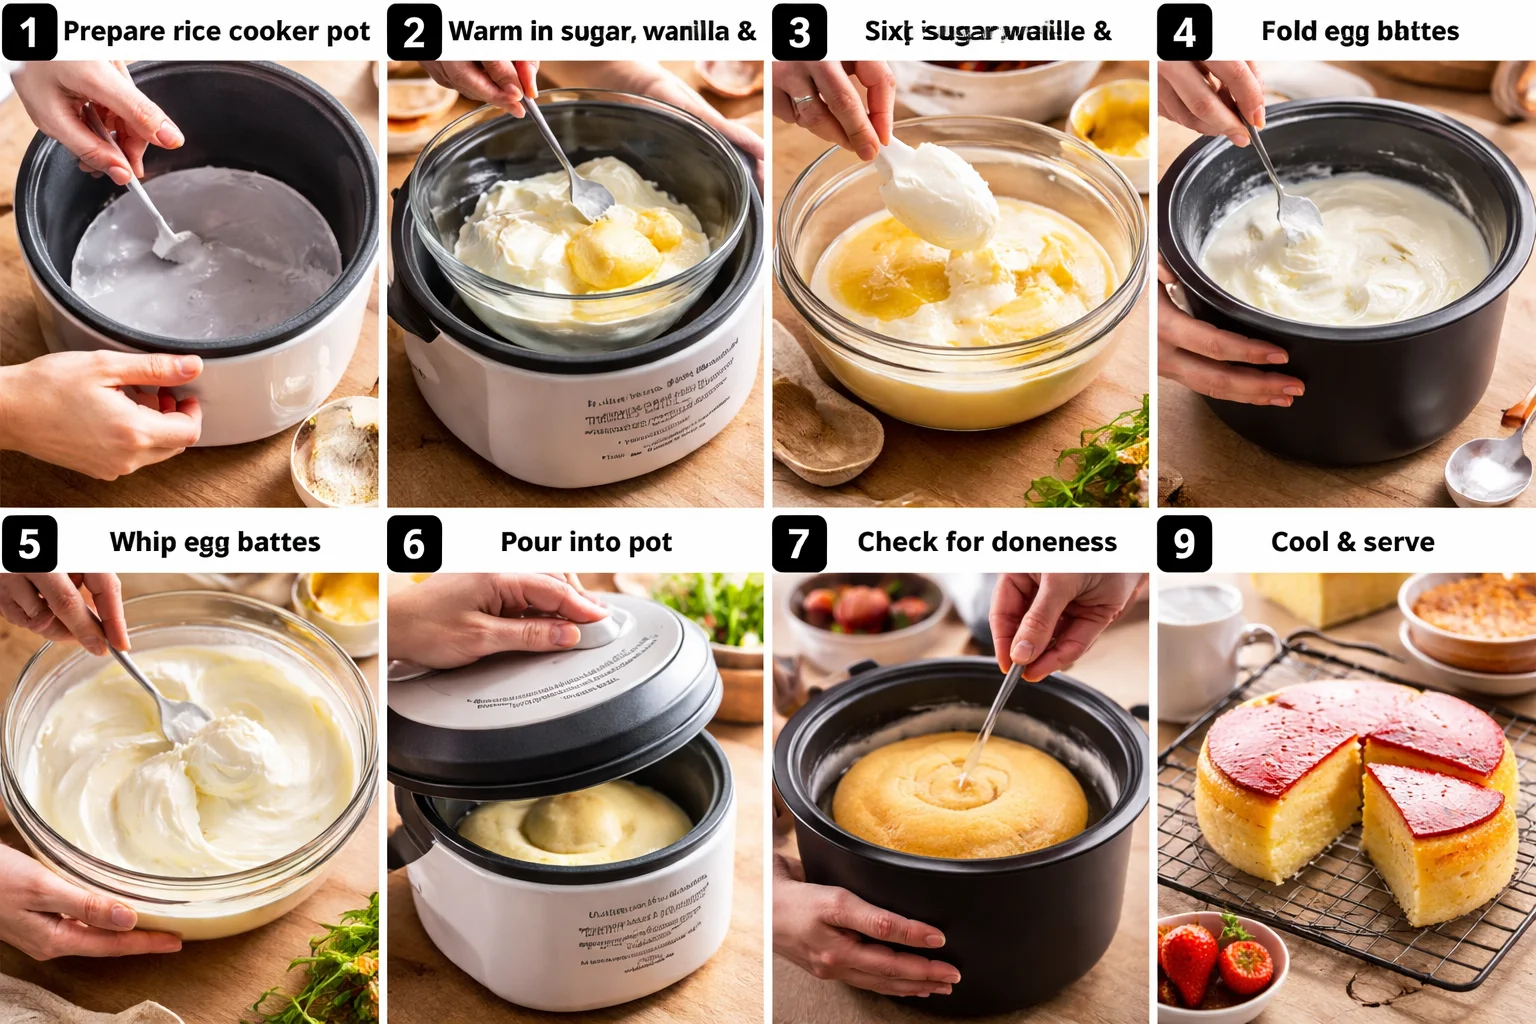
HOW TO MAKE EASY RICE COOKER JAPANESE CHEESECAKE SUCCESSFULLY
Ingredients
- 225 g cream cheese, room temperature
- 40 g unsalted butter, room temperature
- 100 ml milk, room temperature
- 70 g granulated sugar, divided
- 3 large eggs, separated
- 1 tsp vanilla extract
- 1 tbsp lemon juice and 1 tsp lemon zest
- 40 g cake flour, sifted
- 15 g cornstarch, sifted
- 1/8 tsp fine salt
- Optional: 1/8 tsp cream of tartar for egg whites
Directions
- Prep the pot: Lightly grease the rice cooker pot. Line the bottom with parchment and, if you can, add a parchment collar around the sides that rises about 2 inches above the rim. This keeps the sides silky.
- Make the base: In a heat-safe bowl, gently warm cream cheese, butter, and milk over a pot of simmering water, stirring until smooth. Remove from heat. Whisk in half the sugar (35 g), vanilla, lemon juice, and zest. Whisk in yolks one at a time. Sift in flour, cornstarch, and salt. Mix until barely smooth. Do not overmix.
- Whip the whites: In a clean bowl, beat egg whites. When foamy, add cream of tartar if using. Slowly add the remaining 35 g sugar and whip to soft peaks that hold a slight curl. You want glossy and airy, not stiff or dry.
- Fold with care: Add one-third of the whites to the batter and whisk gently to loosen. Fold the rest in two additions using a spatula with slow, sweeping motions. Keep the batter light. If you overmix, the cake can deflate.
- Pour and level: Pour batter into the pot. Gently tap the pot on the counter 2 to 3 times to pop big bubbles. Use a skewer to swirl the surface and release hidden air pockets.
- Cook: Use Cake mode if you have it. If not, use White Rice mode. The total time varies by cooker, usually 50 to 70 minutes. If your cooker clicks to Warm too soon, wait 2 minutes, then start another Cook cycle. Repeat until the center is set.
- Check doneness: Insert a toothpick near the center. It should come out mostly clean with a tiny hint of moisture, not wet batter. The cake should jiggle slightly like set custard.
- Cool gradually: Let the cake rest in the cooker with the lid propped open for 10 minutes. Run a thin spatula around the sides, lift using the parchment, and cool completely on a rack. Chill at least 3 hours for best texture.
- Serve: Dust with powdered sugar if you like. Slice with a warm, thin knife, wiping between cuts for clean edges.
Pro tips for guaranteed fluff
Room temperature ingredients are everything. Cold cream cheese or milk can make a lumpy batter. Soft peaks give the right lift without tunneling. Do not overfold and avoid slamming the pot. Patience pays off with that tender, slightly jiggly center.
If you want to be super specific, a gentle internal temperature around 185 to 190 F means done. But honestly, the jiggle test is enough for most cooks.
Finally, this recipe lives up to its name. It really is a Deliciously Fluffy Japanese Cheesecake in Rice Cooker Made Easy because the cooker handles the moisture control for you.
WHICH RICE COOKER SETTING TO USE
If your rice cooker has a Cake or Bake setting, choose that. It usually runs a longer, lower cycle with steady heat. Most models finish in 55 to 65 minutes.
No Cake mode? No problem. Use White Rice. The cooker might flip to Warm before the cheesecake is done. When it does, wait a couple of minutes so steam drops slightly, then press Cook again. You may need two to three cycles total. Keep an eye on the center near the end.
Steaming mode also works if it keeps a low simmer. Leave the lid on for consistent heat. Avoid opening often since steam loss can collapse the cake.
Turn off Keep Warm once it’s cooked. Extended warm mode can cause condensation that leads to a wet top. If the bottom browns too fast in your cooker, place a thin silicone rack or a ring of crumpled foil under the pot to diffuse heat. It’s a small hack that helps protect that pale, delicate crumb.
Optional backup: If your cooker stops cooperating and the center is almost set, finish in a 300 F oven for 10 to 12 minutes. It’s not traditional here, but it saves the day without sacrificing that signature texture. This still keeps everything easy and true to the spirit of a Deliciously Fluffy Japanese Cheesecake in Rice Cooker Made Easy.
TROUBLESHOOTING
- Collapsed center: Usually from undermixing whites into the base or opening the lid too early. Fold a little more thoroughly next time and keep the lid closed until the final check.
- Gummy middle: Needs more time. Run another short Cook cycle. After cooking, let it rest with the lid ajar for 10 minutes so steam escapes.
- Overbrowned bottom: Your cooker runs hot. Use a thin heat diffuser under the pot or cook in shorter cycles with a 2-minute pause in between.
- Cracks on top: Batter overmixed or whites too stiff. Aim for soft peaks and gentle folding. Also, make sure ingredients are room temp.
- Sticking to pot: Use parchment on the bottom and a light grease on the sides. Run a thin spatula around the edge before lifting.
- Eggy smell: Use fresh eggs, add lemon zest, and a splash more vanilla. Chill thoroughly before serving to mellow any eggy notes.
- Soggy top from condensation: When it clicks to Warm, vent the lid slightly for a few minutes. Dab any moisture with a clean paper towel held just above the surface.
Remember, every rice cooker has its own personality. Once you know how yours behaves, you’ll dial in perfect timing and color. The more you make it, the more consistent your Deliciously Fluffy Japanese Cheesecake in Rice Cooker Made Easy will be.
Common Questions
Can I halve the recipe? Yes. Use a smaller pot or accept a shorter cheesecake. Reduce cook time, but still rely on the jiggle test.
Can I make it gluten free? Swap cake flour for an all-purpose gluten-free blend and keep the cornstarch. The texture stays soft if you fold gently.
How long does it keep? Up to 3 days in the fridge, covered. It tastes best after chilling overnight. You can freeze slices for up to 1 month. Thaw in the fridge.
What toppings work well? Powdered sugar, fresh berries, a spoon of lemon curd, or a thin swipe of strawberry jam. Keep it light to let the texture shine.
Why is my cake not tall? Possibly a wider pot, overfolding, or whites not whipped enough. Use a smaller pot, nail those soft peaks, and avoid deflating the batter.
Your coziest shortcut to a cloud-soft cheesecake
We covered why the rice cooker works so well, the settings you can trust, the step-by-step method, and how to fix common hiccups. Once you make it once, you’ll see just how forgiving it is. This is truly a Deliciously Fluffy Japanese Cheesecake in Rice Cooker Made Easy that you can put on repeat for holidays, weeknights, and everything in between.
If you want to compare notes or pick up timing cues from another home cook, this guide from Rice Cooker Japanese Cheesecake – Kirbie’s Cravings is a helpful read. It matches the spirit of this method and might give you confidence on your first try. Now grab your rice cooker and make some soft, jiggly happiness happen.

Deliciously Fluffy Japanese Cheesecake in Rice Cooker
- Total Time: 75 minutes
- Yield: 4 servings
- Diet: Vegetarian
Description
A delightful, cloud-soft Japanese cheesecake made effortlessly in a rice cooker, perfect for those who want a light and fluffy dessert without the fuss of oven baking.
Ingredients
- 225 g cream cheese, room temperature
- 40 g unsalted butter, room temperature
- 100 ml milk, room temperature
- 70 g granulated sugar, divided
- 3 large eggs, separated
- 1 tsp vanilla extract
- 1 tbsp lemon juice
- 1 tsp lemon zest
- 40 g cake flour, sifted
- 15 g cornstarch, sifted
- 1/8 tsp fine salt
- Optional: 1/8 tsp cream of tartar for egg whites
Instructions
- Lightly grease the rice cooker pot and line the bottom with parchment for easy removal.
- In a heat-safe bowl, gently warm cream cheese, butter, and milk until smooth. Whisk in half the sugar, vanilla, lemon juice, and zest. Add yolks one at a time, then sift in flour, cornstarch, and salt, mixing until barely smooth.
- In a separate bowl, beat egg whites until foamy, adding cream of tartar if using. Gradually add remaining sugar and whip to soft peaks.
- Gently fold one-third of the egg whites into the batter, then fold in the remaining whites in two additions to keep the batter light.
- Pour batter into the prepared pot and tap gently to remove air bubbles.
- Cook on Cake mode or White Rice mode, repeating cycles until the center is set, approximately 50 to 70 minutes.
- Check doneness with a toothpick and let the cake cool in the cooker for 10 minutes before transferring to a wire rack to cool completely. Chill for at least 3 hours before serving.
- Dust with powdered sugar if desired and slice with a warm knife.
Notes
For the best texture, ensure all ingredients are at room temperature. Patience is key to achieving that perfect fluffy cheesecake.
- Prep Time: 15 minutes
- Cook Time: 60 minutes
- Category: Dessert
- Method: Steaming
- Cuisine: Japanese