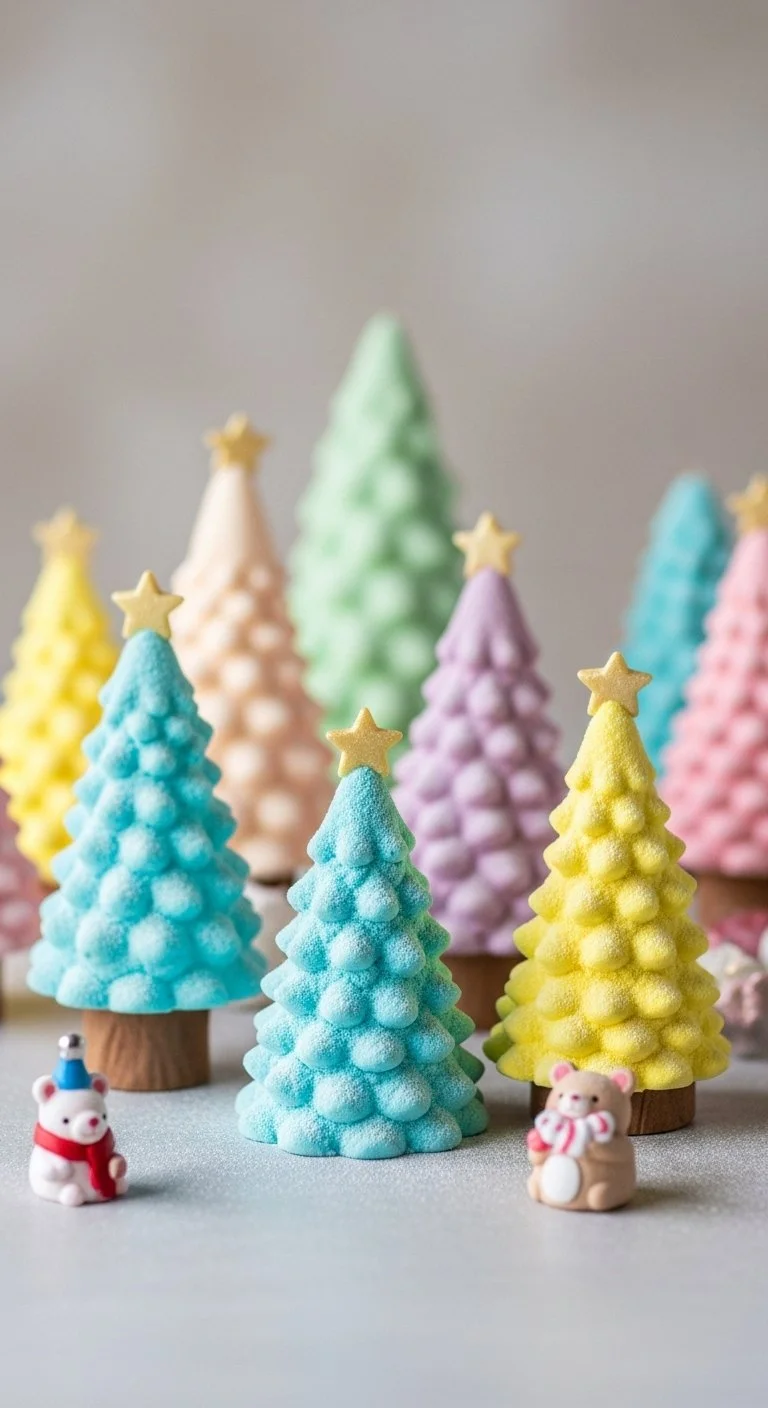
Crystal Forest

Crystal Growing

This post contains Amazon affiliate links. As an Amazon Associate I earn from qualifying purchases.

Crafting your very own crystal forest can be a delightful and educational experience. This mesmerizing project introduces you to the magic of crystallization while allowing your creativity to shine. With vivid colors and stunning shapes, the crystal forest is not only a feast for the eyes but also a great way to explore science in a fun and hands-on manner. The slow growth of your crystals provides a sense of anticipation, making it an engaging craft for all ages. Perfect for a rainy day or as a unique gift, this project promises to enchant anyone who lays eyes on the finished product.

Why You’ll Love This Crystal Forest:

  • Educational Fun: Learn about the science of crystallization while being creative.
  • Visually Stunning: Create an eye-catching centerpiece for your home.
  • Customizable: Choose colors and designs that reflect your personal style.
  • All Ages: Suitable for kids and adults alike, making it a great family project.
  • Satisfying Process: Watching crystals form is a rewarding experience.

Materials:

  • Borax (1 cup)
  • Water (2 cups)
  • Pipe cleaners (various colors)
  • A glass jar or bowl
  • A stirring stick (wooden or plastic)
  • Food coloring (optional)
  • String (optional)
  • A small weight (like a washer or small rock, optional)

Full Step-by-Step:

1. Prepare the Pipe Cleaners

  • Shape: Bend pipe cleaners into your desired shapes (trees, stars, etc.).
  • Texture: Ensure they have enough surface area for crystals to adhere.

2. Create a Saturated Solution

  • Boil Water: In a pot, bring 2 cups of water to a boil.
  • Add Borax: Gradually stir in 1 cup of Borax until completely dissolved, creating a saturated solution.

3. Add Color (Optional)

  • Food Coloring: If desired, add a few drops of food coloring to the boiling solution for vibrant crystals.

4. Set Up Your Crystal Forest

  • Suspension: Attach the shaped pipe cleaners to a string and suspend them in the jar. You can use a pencil or stick laid across the top of the jar for support.
  • Weight: If using, attach a small weight to keep the pipe cleaners submerged.

5. Let it Grow

  • Cool Down: Allow the solution to cool for several hours or overnight undisturbed.
  • Observation: Check on your crystals periodically; they should start forming as the solution cools.

Tips & Variations:

  • Different Shapes: Experiment with various shapes beyond trees—try flowers or geometric designs.
  • Rock Salt: For larger crystals, you can substitute Borax with rock salt.
  • Color Mixing: Combine different food coloring to create unique crystal colors.
  • Add Glitter: For a magical touch, sprinkle glitter into the solution before it cools.

Frequently Asked Questions:

Q1: Can I use a different type of container?
A: Yes, any clear container will work. Just ensure it’s heat-resistant if using hot water.

Q2: How long will it take for crystals to form?
A: Generally, crystals start to form within a few hours, but it’s best to leave them overnight for optimal growth.

Q3: What if my crystals aren’t growing?
A: Make sure the solution was saturated (no more Borax dissolves), and the container is undisturbed.

Q4: Can I reuse the solution for another crystal forest?
A: It’s best to prepare a fresh solution each time, but you can try reusing the old one if it still contains some Borax.

Suggestions:

  • Pair this craft with a science lesson on crystallization.
  • Consider making a small crystal forest to give as a gift or donation.
  • Create themed crystal forests for different occasions or holidays.

Final Thoughts

Creating a crystal forest is not just a craft—it’s an experience that combines artistry with scientific exploration. We hope you enjoy making your own magical forest! Don’t forget to share your versions or leave a comment about your experience with this fun project!

Print
clock clock iconcutlery cutlery iconflag flag iconfolder folder iconinstagram instagram iconpinterest pinterest iconfacebook facebook iconprint print iconsquares squares iconheart heart iconheart solid heart solid icon
crystal forest 2026 02 01 110704 559x1024 1 - Crystal Forest

Crystal Forest Craft


5 Stars 4 Stars 3 Stars 2 Stars 1 Star

No reviews

  • Author: rosalind-chef-2
  • Total Time: 60 minutes
  • Yield: 1 crystal forest
  • Diet: N/A

Description

Create your own mesmerizing crystal forest with this engaging craft that blends artistry and science.


Ingredients

  • Borax (1 cup)
  • Water (2 cups)
  • Pipe cleaners (various colors)
  • A glass jar or bowl
  • A stirring stick (wooden or plastic)
  • Food coloring (optional)
  • String (optional)
  • A small weight (like a washer or small rock, optional)


Instructions

  1. Prepare the Pipe Cleaners: Bend pipe cleaners into desired shapes (trees, stars, etc.) ensuring enough surface area for crystals.
  2. Create a Saturated Solution: Boil 2 cups of water and gradually stir in 1 cup of Borax until completely dissolved.
  3. Add Color (Optional): If desired, add food coloring to the boiling solution.
  4. Set Up Your Crystal Forest: Suspend shaped pipe cleaners in the jar using a pencil for support, adding a weight if necessary.
  5. Let it Grow: Allow the solution to cool undisturbed overnight to form crystals.

Notes

Experiment with different shapes and colors for unique crystal forests. Add glitter for a magical touch!

  • Prep Time: 15 minutes
  • Cook Time: 0 minutes
  • Category: Craft
  • Method: Crafting
  • Cuisine: N/A

Leave a Comment

Crystal Forest

Crystal Growing
  1. Introduction
    Creating your own Crystal Forest is a delightful and engaging craft that brings a piece of nature into your home. This DIY project allows you to explore the beauty of crystals while connecting with the process of crystallization. Perfect for both kids and adults, this craft encourages creativity and can be an excellent educational experience as you watch your crystals grow and change over time. The vibrant colors and unique shapes of the crystals will not only capture your imagination but also provide a stunning centerpiece for your home decor. Plus, the joy of making something with your own hands makes it all the more special. So gather your materials and get ready to bring a little sparkle into your life with this fun and easy craft recipe!

  2. Why You’ll Love This Crystal Forest:

  • Fun Activity: Ideal for family bonding or solo creativity.
  • Educational: Learn about crystallization and chemical reactions.
  • Customizable: Choose colors and shapes that suit your style.
  • Low Cost: Affordable materials make it accessible.
  • Great for All Ages: Simple enough for kids, yet intriguing for adults.
  • Beautiful Outcome: Create stunning decor pieces that impress.
  1. Materials:
  • Epsom salt or sugar
  • Boiling water
  • Food coloring (optional)
  • Clear container or jars
  • String (optional for hanging)
  • Stirring stick
  1. Full Step-by-Step:

Prepare the Solution

  • Boil Water: Start by boiling about 1 cup of water.
  • Add Epsom Salt: Gradually stir in 1–2 cups of Epsom salt or sugar until no more can dissolve.
  • Color It: If desired, add a few drops of food coloring to create vibrant crystals.

Set Up

  • Container Choice: Pour the solution into a clear container or jar.
  • Optional String: Tie string to a stick and suspend it in the solution for hanging crystals.

Crystallization

  • Time to Wait: Allow the setup to cool and sit undisturbed for several hours or overnight.
  • Observe Growth: Check periodically to see the crystals forming and expanding.

Finishing Touch

  • Capture the Beauty: Once fully crystallized, remove the sticks or strings, and display your Crystal Forest!
  1. Tips & Variations:
  • Different Materials: Swap Epsom salt with table sugar or borax for different crystal types.
  • Color Combinations: Experiment with multiple food coloring shades for a rainbow effect.
  • Shape Variety: Use different containers (like molds or bowls) to create various shapes.
  • Texture Changes: Adjust the temperature of water for different crystal textures.
  1. Frequently Asked Questions:

Q: Can I use regular table salt instead of Epsom salt?
A: Yes, you can! Just note that the crystals may differ in shape and structure.

Q: How long does it take for the crystals to form?
A: Generally, it takes anywhere from a few hours to overnight for crystals to form.

Q: What should I do if the crystals don’t grow?
A: Ensure your solution is saturated (add more material) and check the temperature—too warm or too cold can affect growth.

Q: Can I reuse the solution?
A: It’s best to start fresh, as reused solutions may not yield the same results or clarity in crystals.

  1. Suggestions:
  • Share your creations on social media with friends and family.
  • Gift your Crystal Forest to someone who appreciates handmade decor.
  • Host a craft party where everyone makes their own version!
  • Experiment with different container shapes for unique displays.
  1. Final Thoughts
    Creating your own Crystal Forest is not only a fun and educational experience but also a chance to express your creativity uniquely. The beauty of handmade crystals can transform your space and bring joy to your day. We’d love to see your creations! Feel free to share your versions or leave a comment with your experience or any questions you might have. Happy crafting!
Print
clock clock iconcutlery cutlery iconflag flag iconfolder folder iconinstagram instagram iconpinterest pinterest iconfacebook facebook iconprint print iconsquares squares iconheart heart iconheart solid heart solid icon
crystal forest 2026 01 29 104348 559x1024 1 - Crystal Forest

Crystal Forest


5 Stars 4 Stars 3 Stars 2 Stars 1 Star

No reviews

  • Author: rosalind-chef-2
  • Total Time: 480 minutes
  • Yield: 1 Crystal Forest
  • Diet: N/A

Description

A delightful DIY project to create your own stunning Crystal Forest, perfect for home decor and educational fun.


Ingredients

  • 1-2 cups Epsom salt or sugar
  • 1 cup boiling water
  • Food coloring (optional)
  • Clear container or jars
  • String (optional for hanging)
  • Stirring stick


Instructions

  1. Boil about 1 cup of water.
  2. Gradually stir in 1–2 cups of Epsom salt or sugar until no more can dissolve.
  3. If desired, add a few drops of food coloring.
  4. Pour the solution into a clear container or jar.
  5. Optional: Tie string to a stick and suspend it in the solution.
  6. Allow to cool and sit undisturbed for several hours or overnight.
  7. Check periodically to see the crystals forming.
  8. Once fully crystallized, remove the sticks or strings and display your Crystal Forest.

Notes

You can experiment with different materials and colors for unique crystal designs.

  • Prep Time: 15 minutes
  • Cook Time: 0 minutes
  • Category: Craft
  • Method: DIY
  • Cuisine: N/A

Leave a Comment