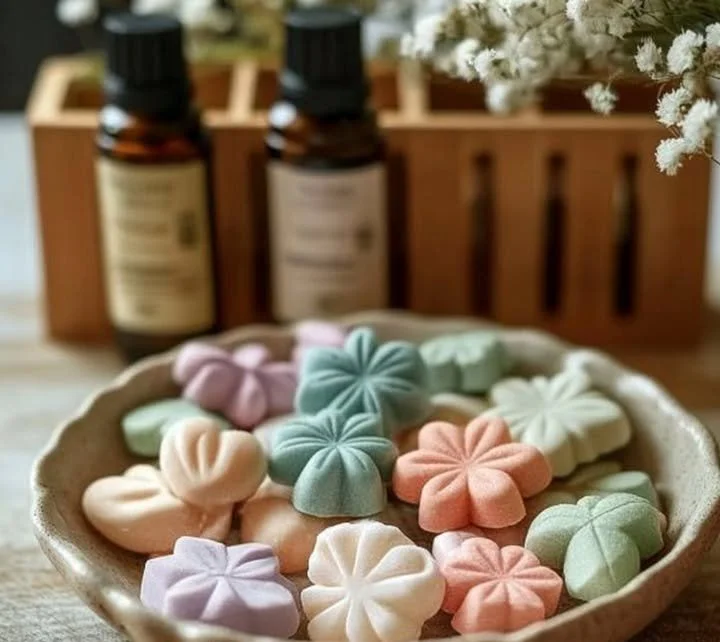
DIY Scented Aroma Stones
Growing up, my grandmother had a special way of making every season feel magical. As the leaves turned and the crisp autumn air settled in, she would fill our home with the warm, inviting scents of cinnamon, vanilla, and clove. I remember sitting at her kitchen table, helping her create these delightful aroma stones that not only filled our home with enchanting fragrances but also served as a beautiful touch in our seasonal decor.
This DIY Scented Aroma Stones recipe captures that very essence of my grandmother’s kitchen, making it a wonderful project to enjoy with your family or to simply indulge in the calming ritual of creating. With the holiday season around the corner, this is the perfect way to bring a touch of nostalgia and warmth into your home. It’s inviting, easy to make, and uniquely aromatic—truly a heartfelt craft that resonates with the spirit of togetherness.
Why You’ll Love This DIY Scented Aroma Stones
- Affordable: Easily sourced materials right at home.
- Personalized Scents: Customize aromas according to your favorite fragrances.
- Kid-Friendly: A fun project for children to engage in creativity.
- Decorative: Beautiful handmade stones that enhance your home decor.
- Long-Lasting: Enjoy your scents for weeks or even months!
Ingredients
- 1 cup baking soda
- 1/2 cup cornstarch
- 3/4 cup water
- 1/2 cup salt
- 1-2 teaspoons essential oils (e.g., cinnamon, lemon, lavender)
- Optional: natural food coloring (for added flair)
Step-by-Step Instructions
1. Mix the Dry Ingredients
- In a bowl, combine 1 cup baking soda, 1/2 cup cornstarch, and 1/2 cup salt.
- Stir well until the mixture is uniform in texture.
2. Add Water
- Gradually pour in 3/4 cup of water while stirring to combine.
- You want a smooth, thick batter.
3. Incorporate Scents
- Add 1-2 teaspoons of your favorite essential oils and mix thoroughly.
- If using food coloring, add a few drops for tinting and blend well until evenly colored.
4. Shape Your Stones
- Preheat your oven to 175°F (80°C).
- Place dollops of the mix onto a parchment-lined baking sheet, flattening them into stone shapes as desired.
5. Bake
- Bake the aroma stones for 2-3 hours, or until they are hard and dry.
- The scents will fill your kitchen with your chosen aroma!
6. Cool and Enjoy
- Let the stones cool completely before using them in your home or gifting them.
Tips & Variations
- Essential Oil Combinations: Mix different oils, like peppermint and vanilla, for a unique scent.
- Decorative Ideas: Add glitter or small dried flowers for personal touches.
- Smaller Stones: Create smaller stones for gifts or use as potpourri in bowls.
Storage Instructions
- Store leftover stones in a cool, dry place in an airtight container to retain their scent longer.
- Avoid exposure to direct sunlight to maintain color and fragrance.
Nutritional Information
- Prep Time: 10 minutes
- Cook Time: 2-3 hours
- Total Time: 2-3 hours 10 minutes
- Calories per serving: Not applicable
- Servings: Makes about 10 aroma stones
Frequently Asked Questions
1. Can I use different essential oils?
Yes! Experiment with your favorite scents or seasonal aromas.
2. How long do the aroma stones last?
With proper storage, they can last several weeks to months before needing refreshment with additional oils.
3. Can I color the stones naturally?
Absolutely! Use natural dyes like beet juice or turmeric for a beautiful hue.
4. What if I don’t have a baking sheet?
You can use any oven-safe dish or tray. Just ensure it’s lined to prevent sticking.
Serving Suggestions or Pairings
Pair your aroma stones with warm spiced cider or freshly baked cookies to enhance those cozy vibes. They also make lovely gifts alongside scented candles or essential oil sets.
Final Thoughts
Creating DIY Scented Aroma Stones is not just a fun and fragrant craft; it becomes a cherished activity that connects generations, much like the fond memories of my grandmother’s warmth-filled kitchen. I invite you to try this recipe and share your experiences or variations in the comments. Let’s keep the tradition alive together!

