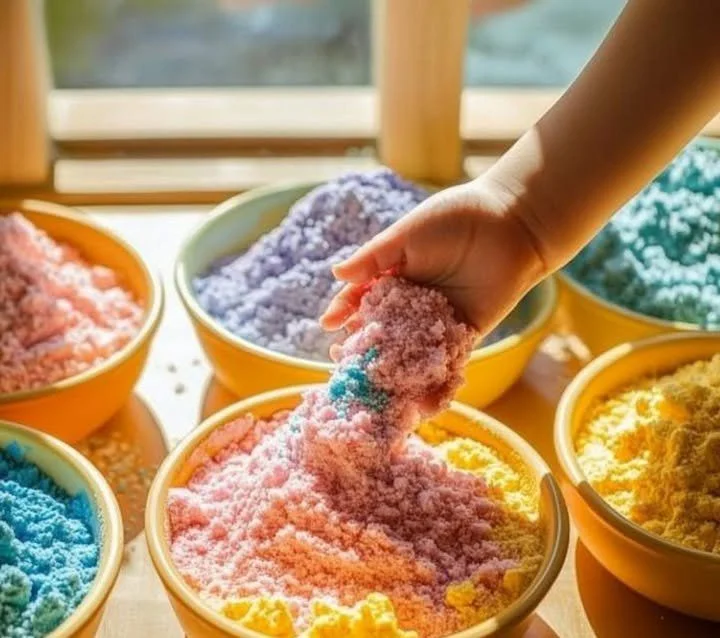
Homemade Kinetic Sand
As a child, I spent countless afternoons digging in the sand at the beach, sculpting castles and creatures alongside my siblings. The feel of the grains slipping through my fingers and the artistic possibilities stirred a creativity in me that remains alive today. Inspired by that joyous time, I wanted to recreate the tactile delight of sand, but in a form we could enjoy indoors—and that’s how this delightful homemade kinetic sand came to be! It’s a fantastic indoor activity for kids during these chilly fall months, allowing them to explore texture and shape as they play. Better yet, it’s incredibly easy to make and entirely safe for little hands.
This homemade kinetic sand is not just a fun craft; it offers therapeutic benefits that can help children develop fine motor skills while sparking their imagination. So let’s get started on this captivating sensory experience that brings a touch of the beach right into your home!
Why You’ll Love This Homemade Kinetic Sand
- Kid-Approved: Perfect entertainment for children of all ages.
- Non-toxic: Safe ingredients ensure peace of mind for parents.
- Sensory Play: Ideal for developing fine motor skills and creativity.
- Easy to Clean: Minimal mess compared to traditional sand.
- Customizable: Add colors or scents for a personalized touch!
Ingredients
- 4 cups all-purpose flour
- 1 cup baby oil (or vegetable oil)
- 1 cup water
- Optional: Food coloring for vibrant hues
- Optional: Cinnamon or vanilla extract for added aroma
Step-by-Step Instructions
1. Combine Flour and Oil
- In a large mixing bowl, combine 4 cups of all-purpose flour with 1 cup of baby oil (or your chosen oil).
- Mix together using your hands or a spoon until it forms a crumbly texture resembling wet sand.
2. Add Water
- Slowly pour in 1 cup of water while continuing to mix.
- Stir until the mixture begins to bind together, ensuring it maintains a moldable consistency.
3. Color It Up (Optional)
- If you want to add a fun twist, divide the sand into smaller batches.
- Add a few drops of food coloring to each batch and knead until evenly colored.
4. Add Fragrance (Optional)
- For a sensory boost, consider sprinkling in some cinnamon or a few drops of vanilla extract.
- Knead it well to distribute the aroma.
5. Storage
- Store your kinetic sand in an airtight container to keep it fresh.
- It should last for several weeks if kept sealed.
Tips & Variations
- Texture Adjustment: If your sand is too dry, add small amounts of water gradually until it reaches the desired consistency.
- Color Mixing: Experiment with mixing different colors to create unique shades.
- Addins: Try adding glitter for extra sparkle or small beads for a festive look.
- DIY Gluten-Free Version: Substitute flour with gluten-free flour blends.
Storage Instructions
To keep your kinetic sand fresh, store it in an airtight container at room temperature. Avoid refrigerating, as this can change its texture. If it dries out, you can revive it by adding a tiny bit of water.
Nutritional Information
- Prep time: 10 minutes
- Cook time: 0 minutes (no cooking involved!)
- Total time: 10 minutes
- Calories per serving: N/A (not intended for consumption)
- Servings: N/A (as this is a craft recipe)
Frequently Asked Questions
-
Is this kinetic sand edible?
- No, this recipe is meant for play and should not be consumed.
-
What should I do if my sand is too dry?
- Gradually add a few drops of water and mix until you reach a moldable consistency.
-
Can I use essential oils for fragrance?
- Yes, natural essential oils can be used, but ensure they are safe for children if you choose to go this route.
-
How long does homemade kinetic sand last?
- When stored properly in an airtight container, it can last several weeks.
Serving Suggestions or Pairings
Pair this kinetic sand with various tools for added fun, such as molds, cookie cutters, scoops, or even toy animals to enhance imaginative play.
Final Thoughts
Creating homemade kinetic sand is not just a worthwhile activity but a delightful way to spark creativity and build fine motor skills. I invite you to try it out with your little ones and share your unique creations or experiences in the comments below. Let’s make playtime a little more special together!

