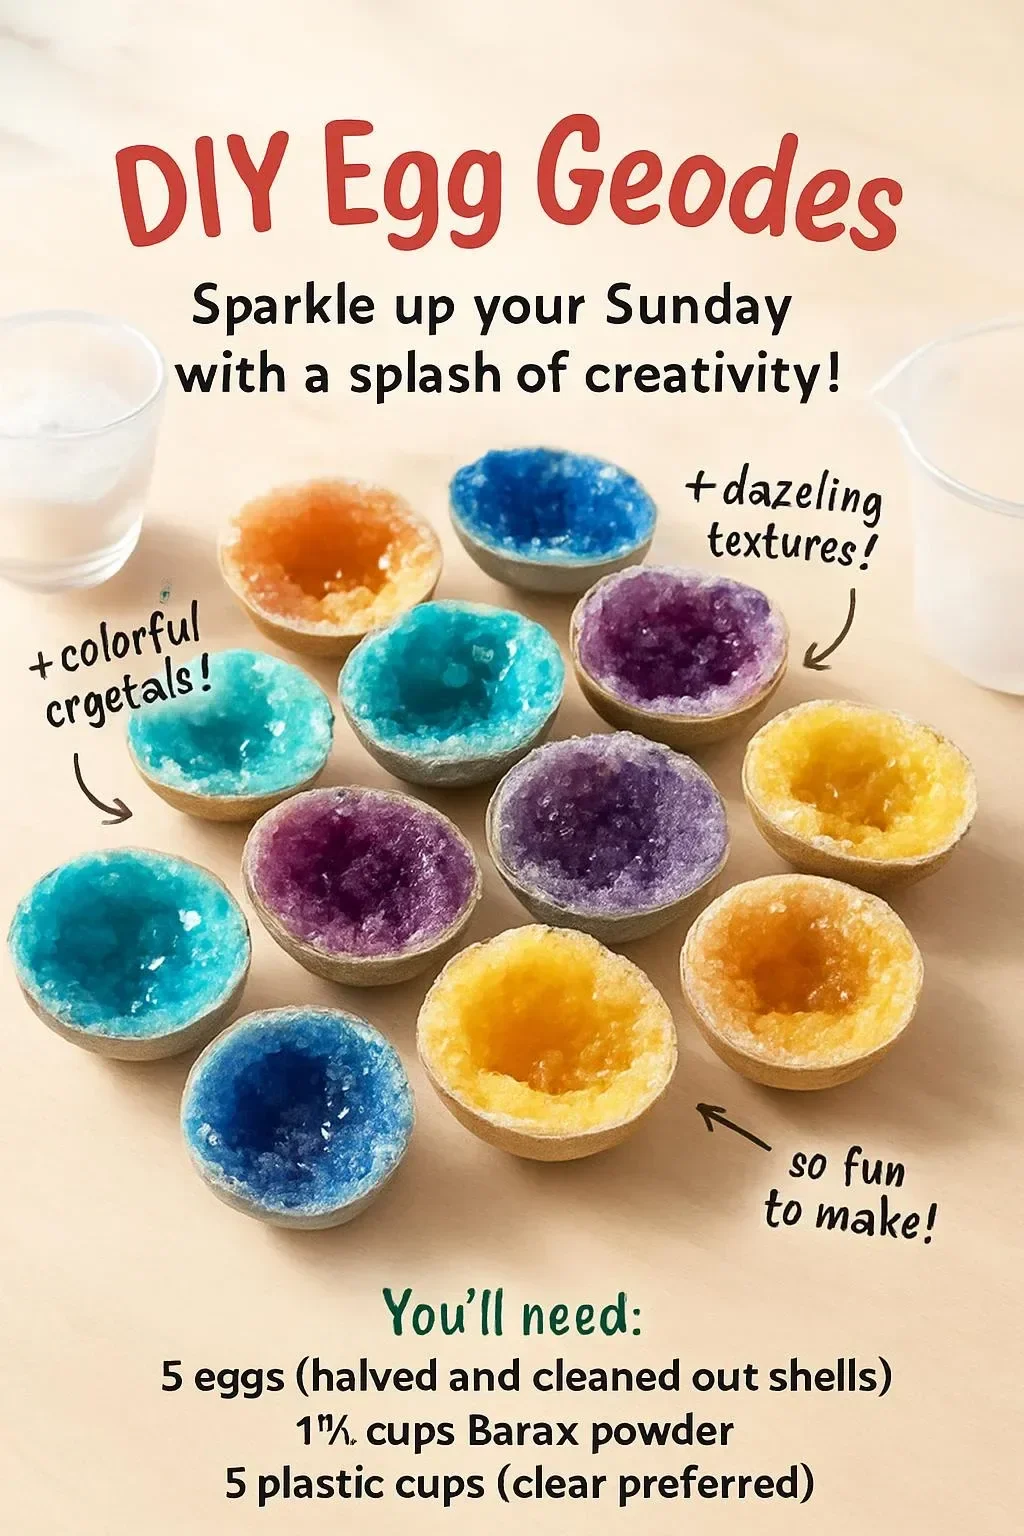
Transforming ordinary eggs into stunning DIY egg geodes is a fascinating and creative craft that brings a bit of art and science into your home. This project is not just a fun way to reuse eggshells, but it also teaches the beauty of crystal formations and color mixing. Perfect for all ages, egg geodes can be customized to match any decor or personal style, making them a delightful gift or decorative piece. Whether you’re working on a rainy day project or looking for a fun activity to share with family and friends, this craft is sure to spark creativity and inspire wonder. Dive into the world of DIY egg geodes, and let your imagination take flight!
Why You’ll Love This DIY Egg Geodes:
- Creative Expression: Use different colors to create unique designs.
- Educational Element: Learn about crystals and bonding processes in a fun way.
- Eco-Friendly: Reuse materials that would typically be discarded.
- Easy to Make: Simple steps make this a great project for all skill levels.
- Perfect for Gifts: Handmade items are thoughtful and cherished.
- Conversation Starter: Impress friends and family with your artisanal creations.
- Sensory Fun: Enjoy the textures and colors in crafting.
Materials:
- Clean eggshells (halved and thoroughly rinsed)
- Baking soda
- White school glue
- Water
- Food coloring (various colors)
- Toothpick or small paintbrush
- Baking sheet
- Parchment paper
- Small bowls for mixing
Full Step-by-Step
Preparing the Eggshells
- Clean and Dry: Ensure eggshells are completely empty, rinsed, and dried before use.
- Line Baking Sheet: Place parchment paper on your baking sheet to avoid sticking.
Making the Crystal Solution
- Mix Ingredients: In small bowls, combine 1 tablespoon of baking soda, 1 tablespoon of white school glue, and 1 tablespoon of water.
- Stir Well: Mix until you have a smooth and thick consistency.
Adding Colors
- Color the Solution: Divide the mixture into bowls based on how many colors you want. Add a few drops of food coloring to each bowl and stir to mix.
- Choose Your Colors: Experiment by mixing colors for unique geodes.
Coating the Eggshells
- Dip Eggshells: Using a toothpick or small paintbrush, carefully coat the inside of each eggshell with the colored mixture.
- Do It in Layers: Create depth by allowing one layer to dry slightly before adding another color.
Drying Process
- Let Them Sit: Place the coated eggshells on the prepared baking sheet.
- Dry Time: Allow the eggshells to dry completely for about 24 hours.
Final Touches
- Display Your Artwork: Once dry, arrange your egg geodes in a decorative bowl or hang them for an artistic display.
Tips & Variations
- Color Swaps: Try pastels for a softer look or go bold with vibrant hues.
- Add Glitter: Incorporate glitter to the mixture for a sparkly effect.
- Different Sizes: Experiment with large eggs or quail eggs for variety.
- Make it a Group Activity: Invite friends or family to create their own versions with personalized themes.
Frequently Asked Questions
1. Can I use other types of glue?
Yes, while white school glue works best, you can also use clear-drying craft glue for similar results.
2. What if I don’t have baking soda?
You can try using table salt as a substitute, but the crystal formation may differ.
3. How long do these egg geodes last?
They can last for months if kept in a dry environment; humidity can cause them to degrade quicker.
4. Can I use artificial colors instead of food coloring?
Yes, but be cautious as some artificial colors may not produce the same vibrant results.
Suggestions
- Host a DIY egg geodes party and provide snacks and drinks for a fun, creative gathering.
- Incorporate themes like seasons or holidays into your designs for seasonal decor.
- Create small gift sets with different color combinations for friends and family.
Final Thoughts
Making DIY egg geodes is a simple yet enchanting craft that allows for endless creativity. Whether displayed proudly or gifted to loved ones, these geodes offer a unique touch to any setting. We’d love to see your versions of this craft! Share your creations or leave a comment about your experience; we can’t wait to hear from you!
Print
DIY Egg Geodes
- Total Time: 1455 minutes
- Yield: Varies by number of eggshells used
- Diet: N/A
Description
Transform ordinary eggs into stunning DIY egg geodes with this fun and educational craft project. Perfect for all ages, this activity fosters creativity and can be customized to your personal style.
Ingredients
- Clean eggshells (halved and thoroughly rinsed)
- Baking soda
- White school glue
- Water
- Food coloring (various colors)
- Toothpick or small paintbrush
- Baking sheet
- Parchment paper
- Small bowls for mixing
Instructions
- Ensure eggshells are completely empty, rinsed, and dried before use.
- Place parchment paper on your baking sheet to avoid sticking.
- In small bowls, combine 1 tablespoon of baking soda, 1 tablespoon of white school glue, and 1 tablespoon of water. Stir until smooth and thick.
- Divide the mixture into bowls based on how many colors you want. Add a few drops of food coloring to each bowl and mix.
- Using a toothpick or small paintbrush, coat the inside of each eggshell with the colored mixture.
- Allow the first layer to dry slightly before adding another color for depth.
- Place the coated eggshells on the prepared baking sheet and let them dry completely for about 24 hours.
- Once dry, arrange your egg geodes in a decorative bowl or hang them for display.
Notes
Try using pastels for a softer look or bold colors for vibrant geodes. Adding glitter can provide a sparkly effect.
- Prep Time: 15 minutes
- Cook Time: 1440 minutes
- Category: Craft
- Method: Crafting
- Cuisine: N/A
Nutrition
- Serving Size: N/A
- Calories: N/A
- Sugar: N/A
- Sodium: N/A
- Fat: N/A
- Saturated Fat: N/A
- Unsaturated Fat: N/A
- Trans Fat: N/A
- Carbohydrates: N/A
- Fiber: N/A
- Protein: N/A
- Cholesterol: N/A

