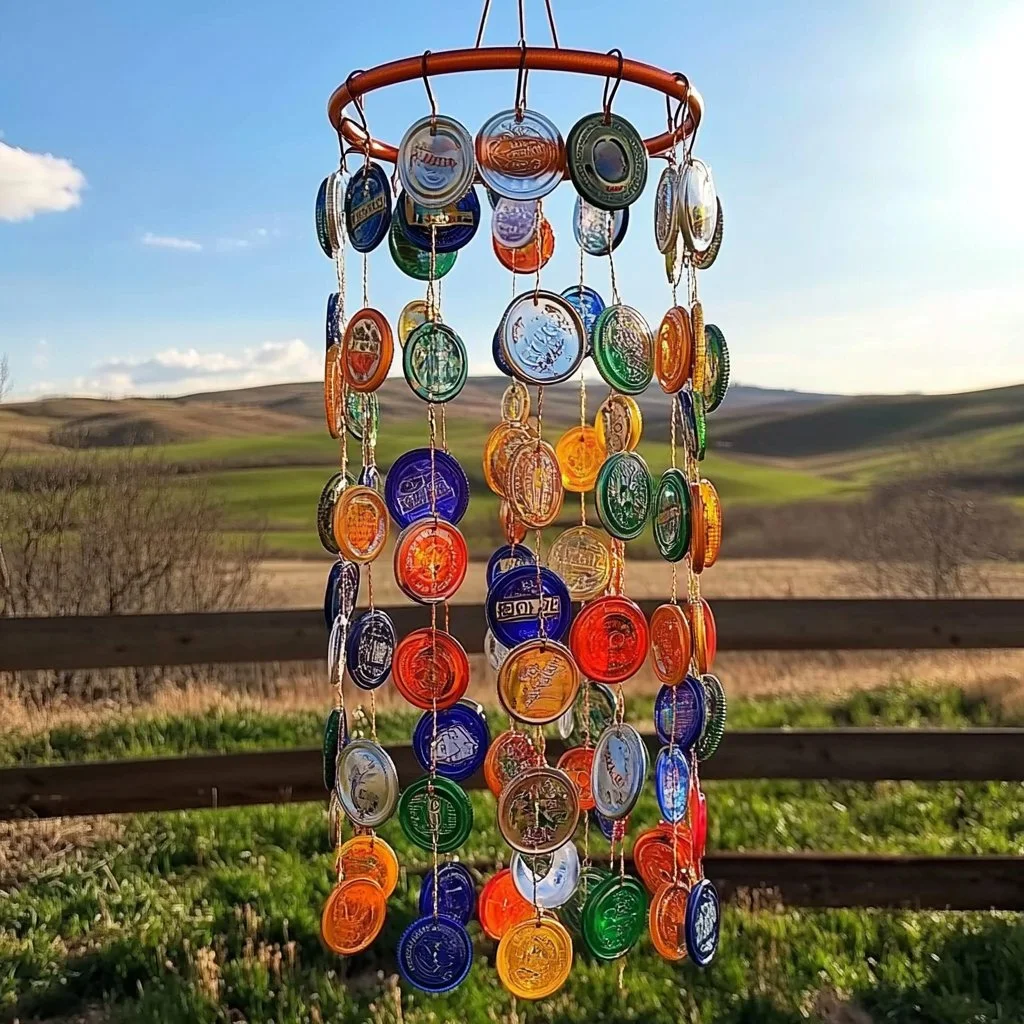
Creating a bottle cap wind chime is not only an enjoyable DIY project but also a sustainable way to repurpose items that would otherwise end up in the trash. This craft combines creativity with functional art, allowing you to express your personality while enhancing your outdoor space. The gentle clink of caps in the wind creates a soothing ambiance, making it a perfect addition to gardens, porches, or balconies. Plus, it’s a fantastic way to engage with family and friends, making memories while crafting together.
Why You’ll Love This Bottle Cap Wind Chime
- Eco-Friendly: Reuses bottle caps, reducing waste.
- Customizable: Use different colors and designs to match your style.
- Simple and Fun: Ideal for crafters of all skill levels.
- Great Activity: Perfect for family bonding or group gatherings.
- Unique Sound: Creates a pleasant, melodic tinkling noise in the breeze.
Materials
- Clean, colorful bottle caps (varying sizes)
- Strong twine or fishing line
- A sturdy stick or metal ring for the base
- Scissors
- Drill or sharp object (for creating holes)
- Optional: Paint, beads, or other decorative items
Full Step-by-Step
Prepare the Bottle Caps
- Clean: Ensure all bottle caps are clean and dry.
- Drill Holes: Use a drill or a sharp object to create holes in the center of each cap.
Create the Base
- Select Base Material: Choose a stick or a metal ring that is sturdy enough to hold the weight of the caps.
- Cut Twine: Cut lengths of twine or fishing line, varying in sizes for visual appeal.
Assemble the Wind Chime
- Tie Caps: String each bottle cap onto the twine, securing them with knots.
- Tips: Mix colors and sizes for a more dynamic look.
- Attach to Base: Knot the other end of each twine piece to the stick or ring.
- Balance: Ensure an even distribution of caps for stability.
Final Touches
- Hang Your Chime: Find a suitable location outdoors, ensuring it’s secure and can catch the wind.
- Enjoy: Step back and listen to the soft sounds of your new creation!
Tips & Variations
- Customize Colors: Paint the bottle caps for a personalized touch.
- Add Decorative Elements: Incorporate beads or charms for additional flair.
- Change Lengths: Experiment with varying lengths of twine for visual interest.
- Use Different Caps: Try using caps from soda bottles, beer bottles, or even jar lids.
Frequently Asked Questions
Q: What if I don’t have a drill to make holes in the caps?
A: You can use a sturdy nail and hammer to carefully puncture a hole in each cap.
Q: Can I use materials other than twine or fishing line?
A: Yes, you can use sturdy string, ribbon, or even thin wire depending on what you have at home.
Q: How can I make my wind chime more durable?
A: Use weather-resistant materials and seal any paint with a clear coat to protect against the elements.
Q: What is the best place to hang my wind chime?
A: Hang it in a location where it can catch the wind, such as near a window or on a porch, but away from direct rain if it’s not made of weatherproof materials.
Suggestions
- Consider making themed wind chimes for different seasons or holidays.
- Get friends or family involved for a fun crafting party—everyone can make their own version.
- Use caps from different brands for a varied appearance and sound.
Final Thoughts
Crafting a bottle cap wind chime is a delightful way to express creativity while benefiting the environment. It serves as a beautiful decoration while providing soothing sounds. We invite you to share your versions in the comments and let us know how your wind chime turned out! Happy crafting!
Print
Bottle Cap Wind Chime
- Total Time: 15 minutes
- Yield: 1 wind chime
- Diet: N/A
Description
Create a beautiful and eco-friendly bottle cap wind chime that adds a personal touch to your outdoor space.
Ingredients
Instructions
- Clean all bottle caps and ensure they are dry.
- Use a drill or a sharp object to create holes in the center of each cap.
- Select a sturdy stick or metal ring for the base.
- Cut lengths of twine or fishing line in varying sizes.
- String each bottle cap onto the twine, securing them with knots.
- Knot the other end of each twine piece to the stick or ring.
- Ensure an even distribution of caps for balance and stability.
- Find a suitable location outdoors to hang your wind chime securely.
- Step back and enjoy the soothing sounds of your new creation!
Notes
Consider customizing colors and adding decorative elements like beads for a unique touch.
- Prep Time: 15 minutes
- Cook Time: 0 minutes
- Category: DIY Craft
- Method: Crafting
- Cuisine: N/A
Nutrition
- Serving Size: 1 chime
- Calories: 0
- Sugar: 0g
- Sodium: 0mg
- Fat: 0g
- Saturated Fat: 0g
- Unsaturated Fat: 0g
- Trans Fat: 0g
- Carbohydrates: 0g
- Fiber: 0g
- Protein: 0g
- Cholesterol: 0mg

